The following steps should be observed:
Good to Know
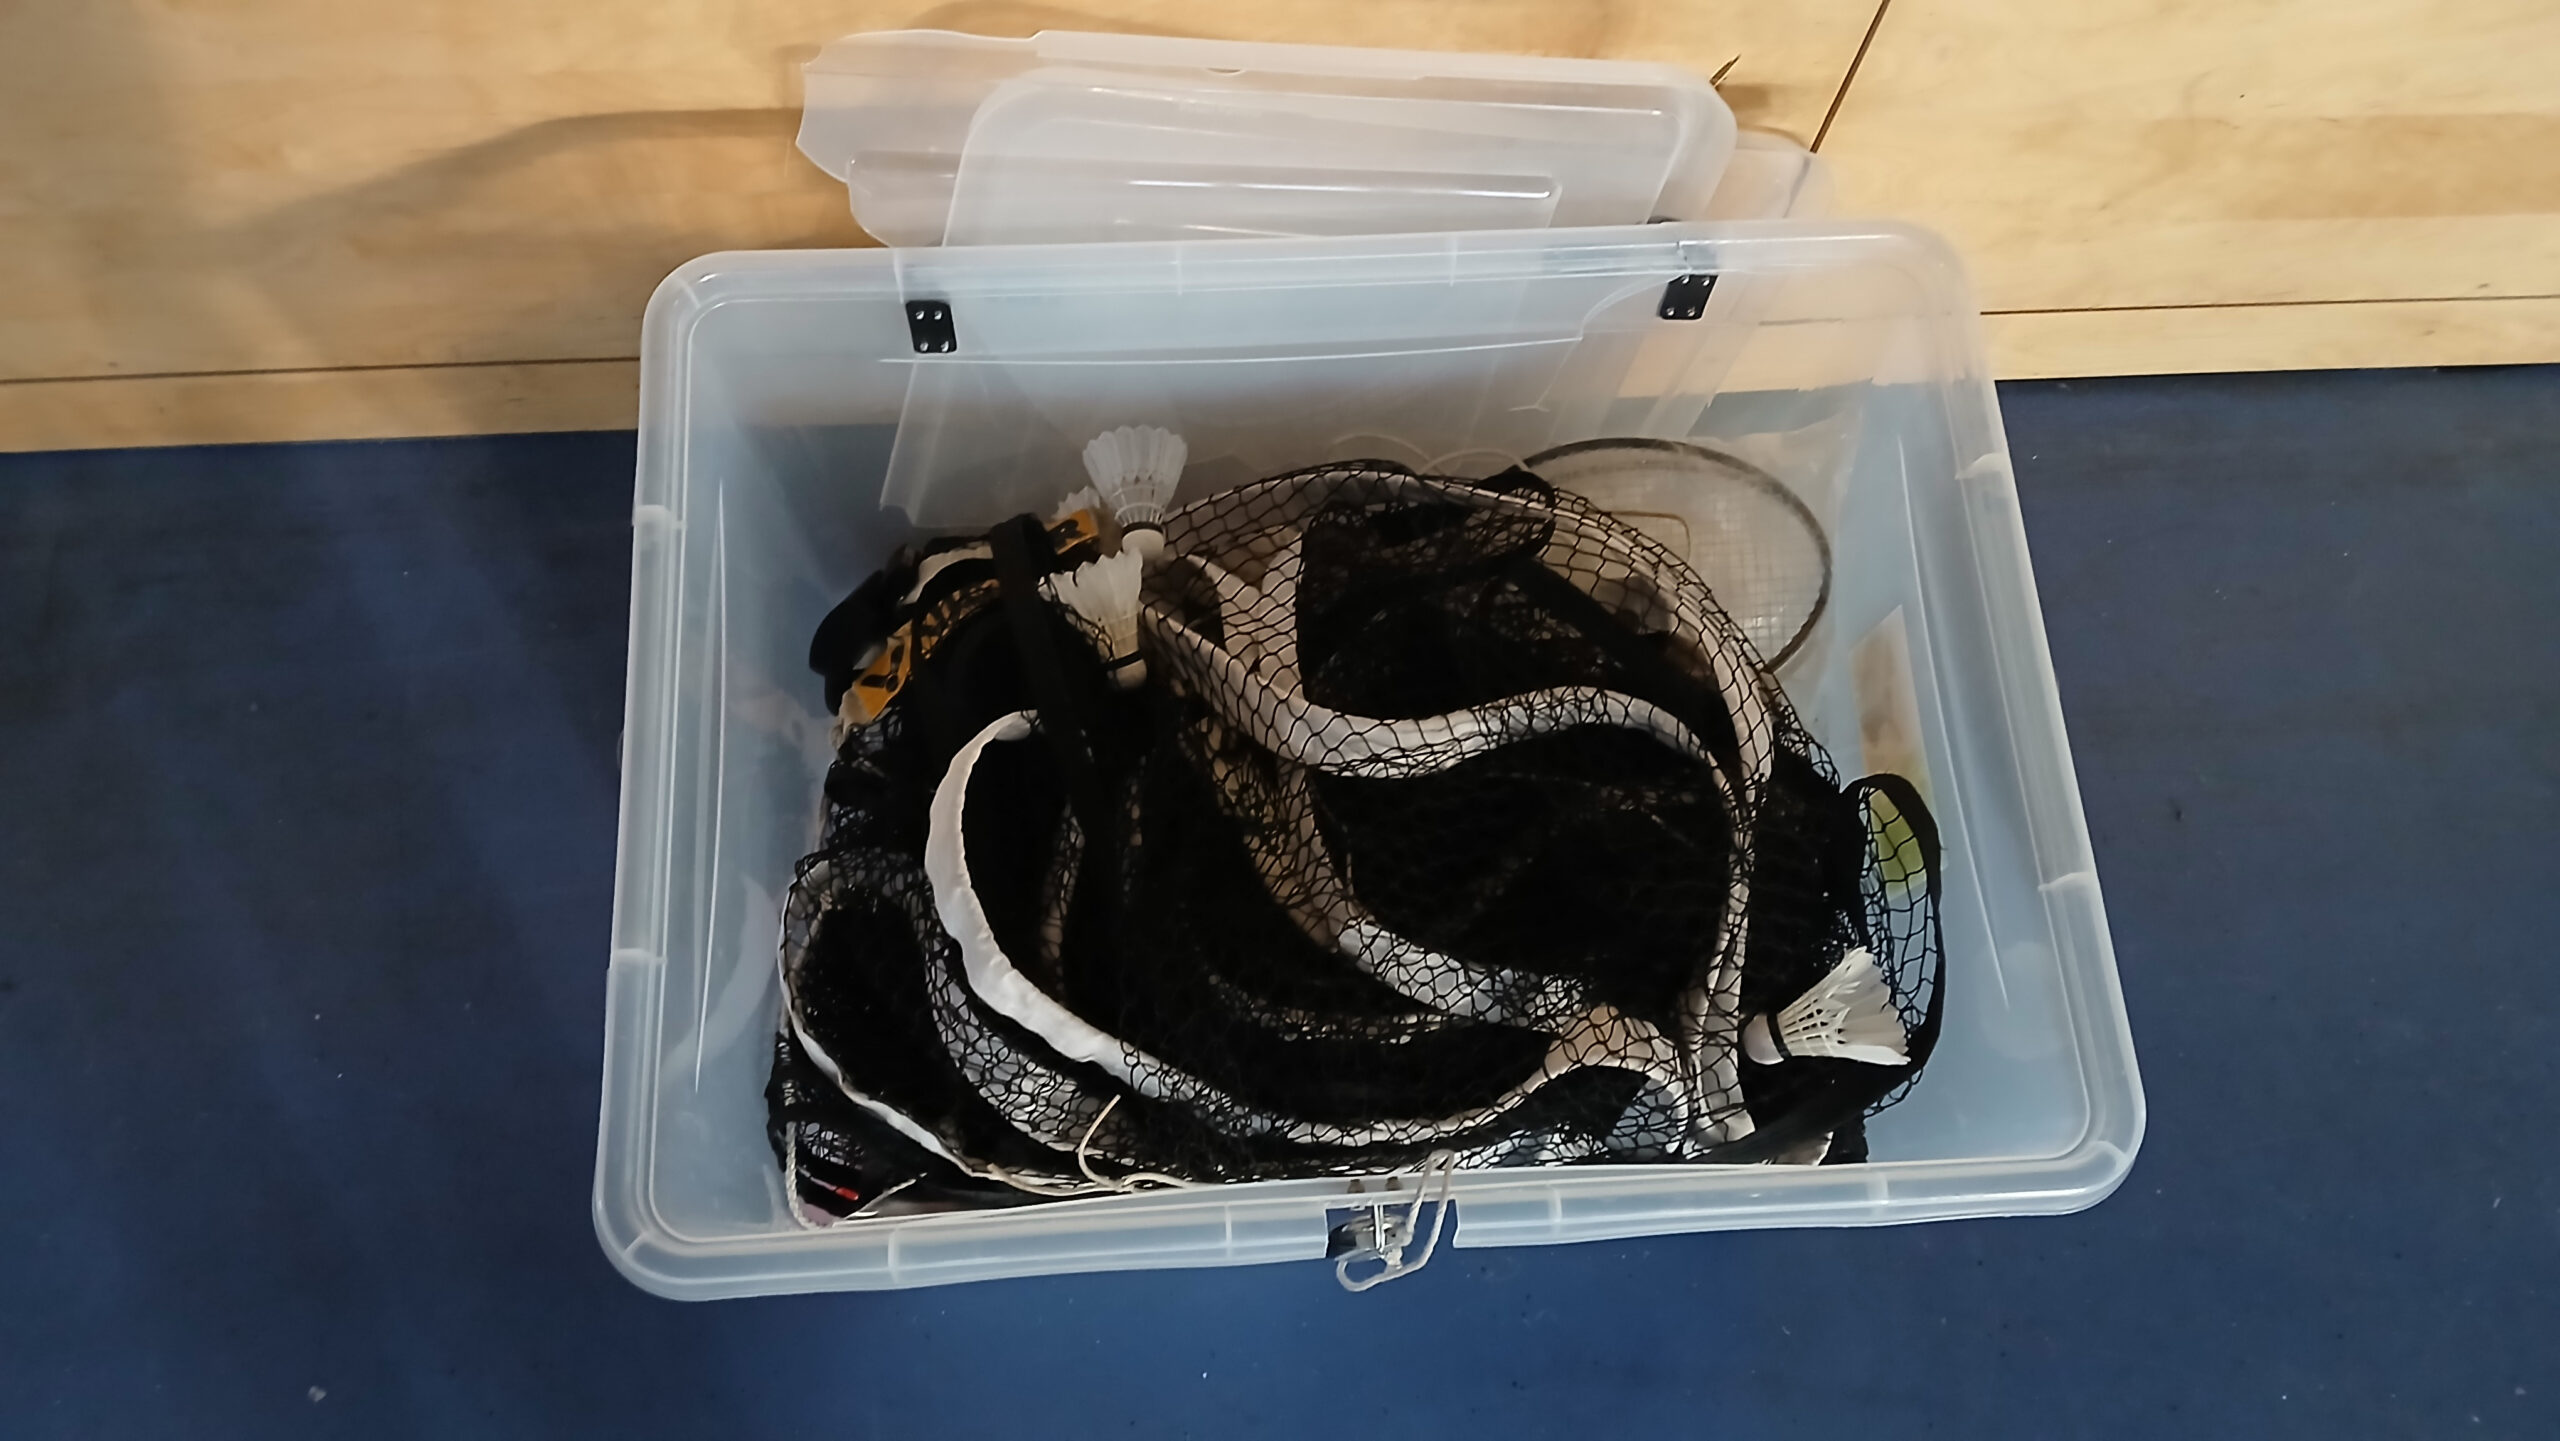
- Registration forms for new members can be found in the box.
- There are also ice packs in the box, when needed in case of injury.
- The tap in the teachers‘ room (and various other taps, toilets, showers, and so on…) can’t always be completely turned off. However, you can pull on the tap (especially the one in the teachers‘ room, which is often used for refilling water) and significantly reduce the water flow. It doesn’t need to run at full blast all the time…
- We don’t open the windows in the material garages. That means we don’t need to close them either. 🙂 If they are open, unlike the hall windows, it’s not a problem, as it still won’t rain in.
Setup / Before the Game
The most logical order is roughly like this…
1. Unlock Hall
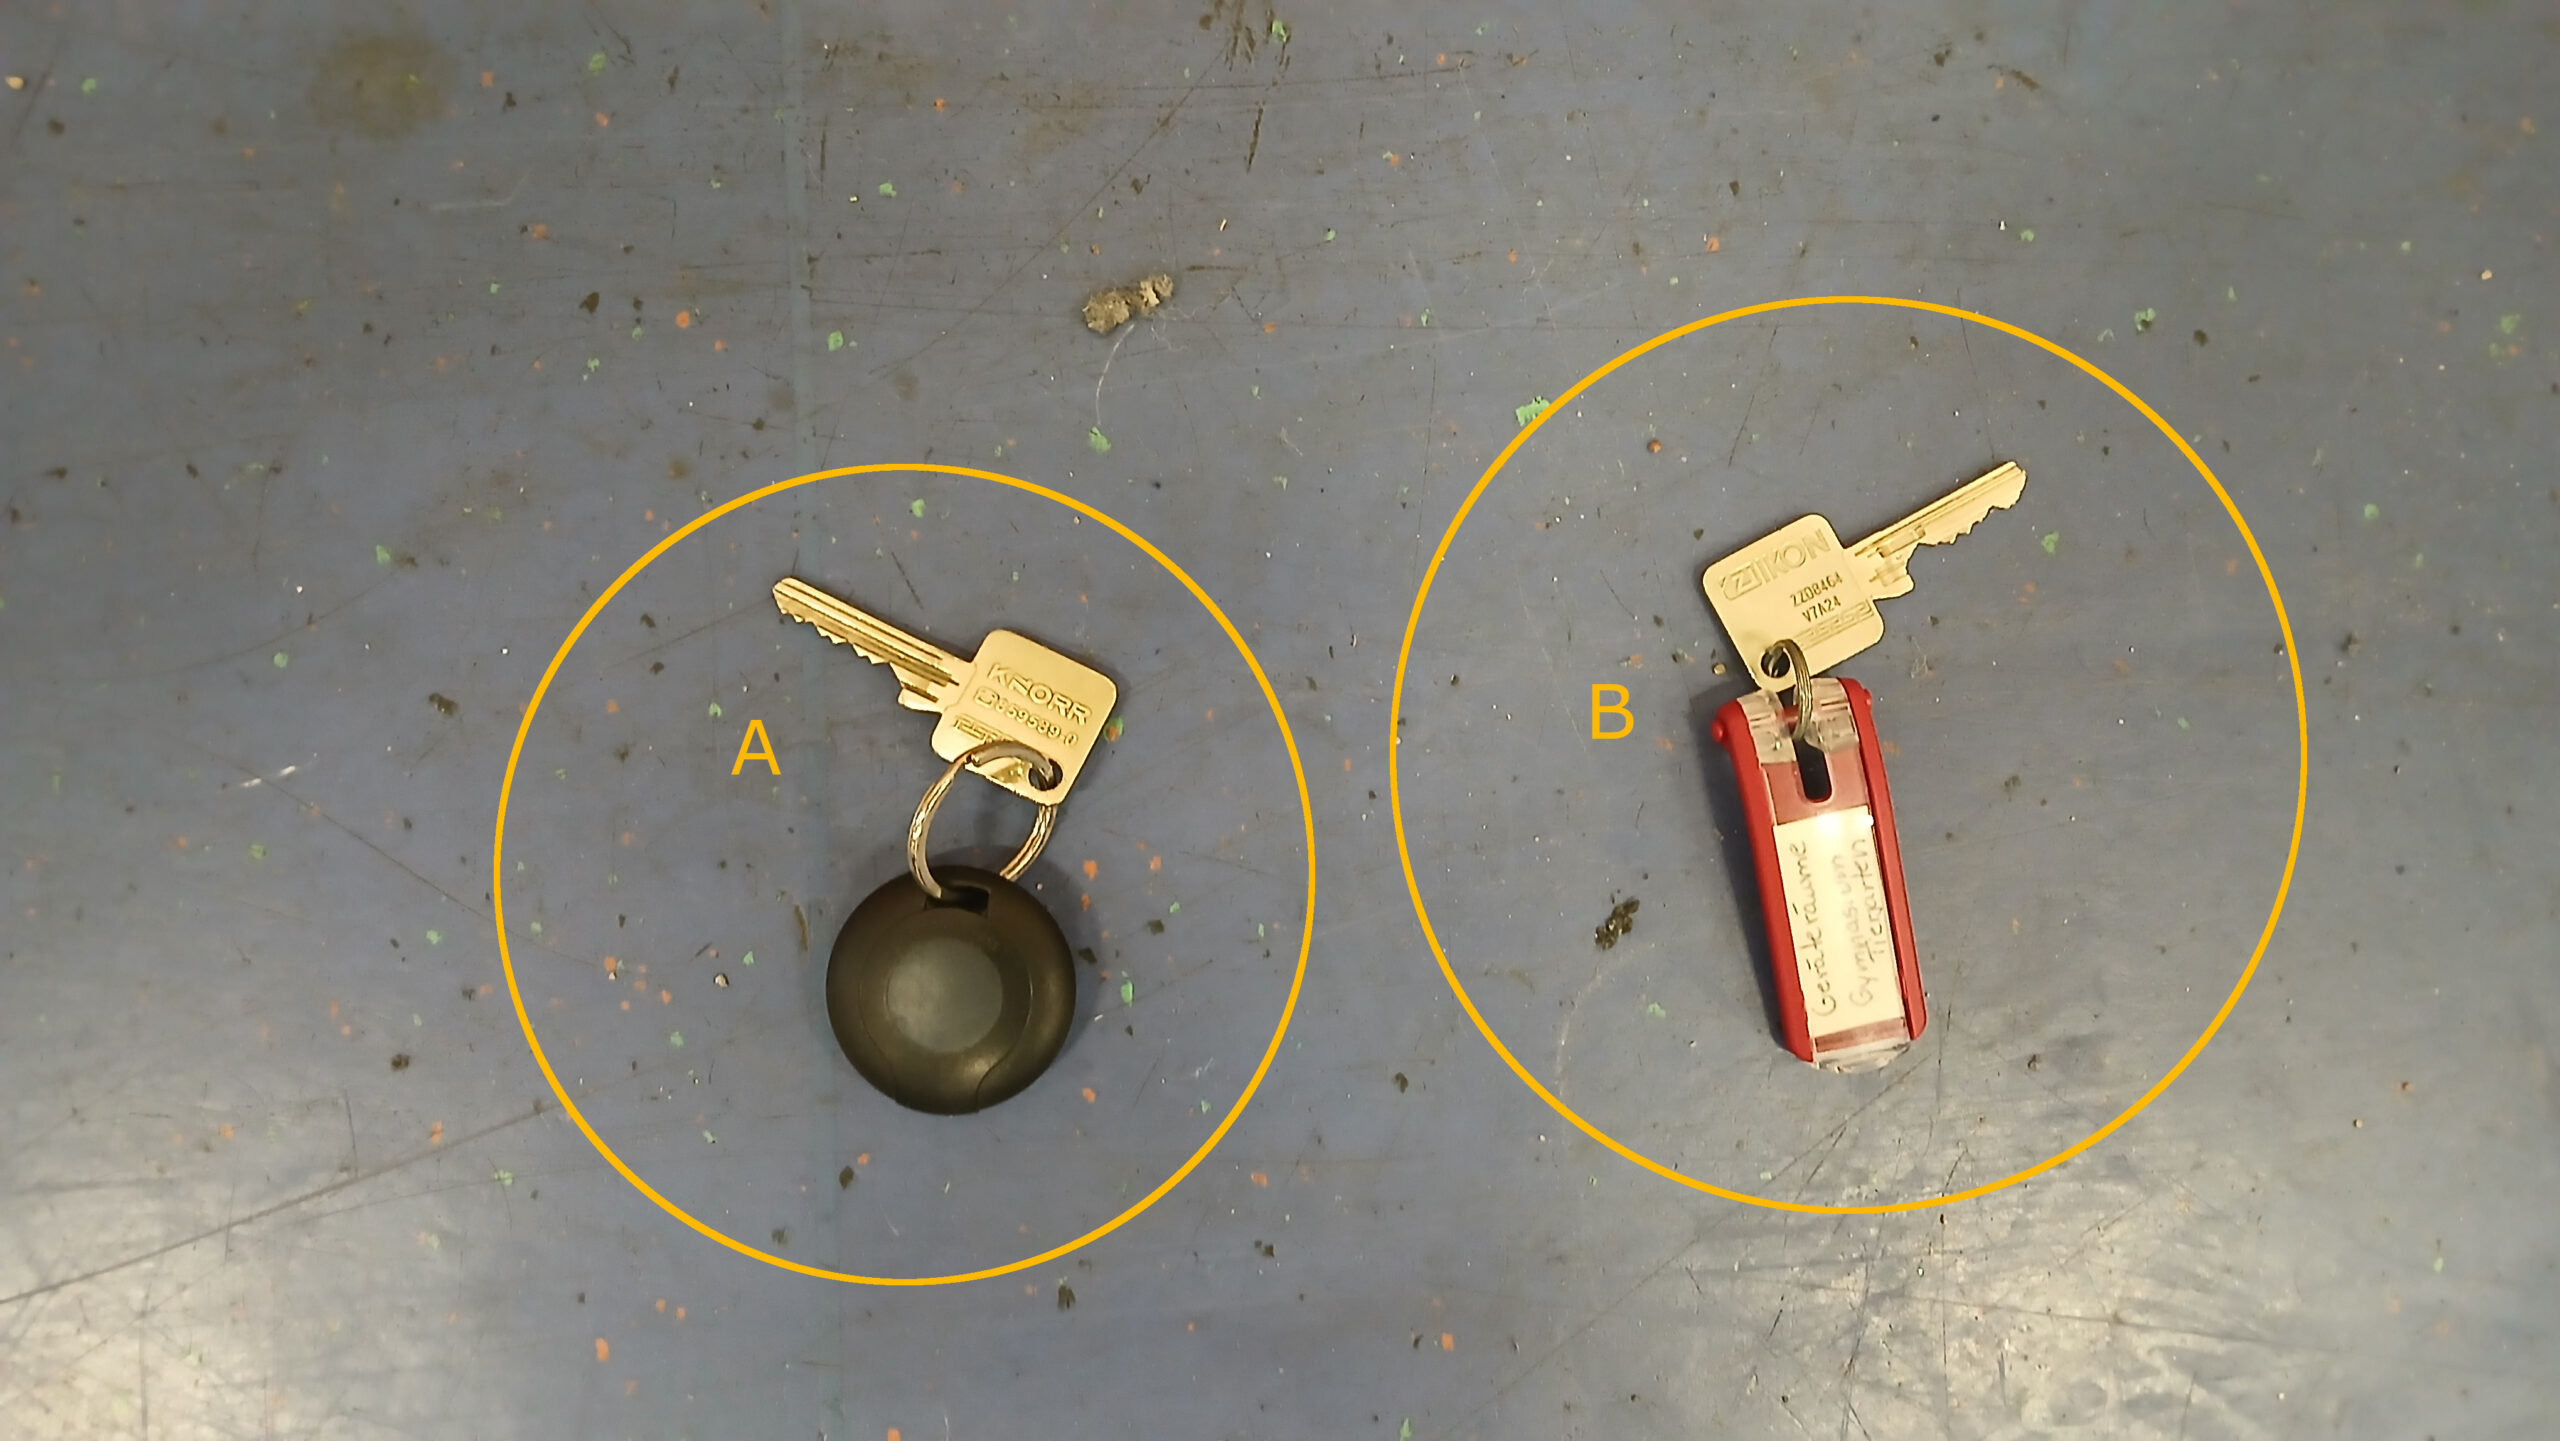
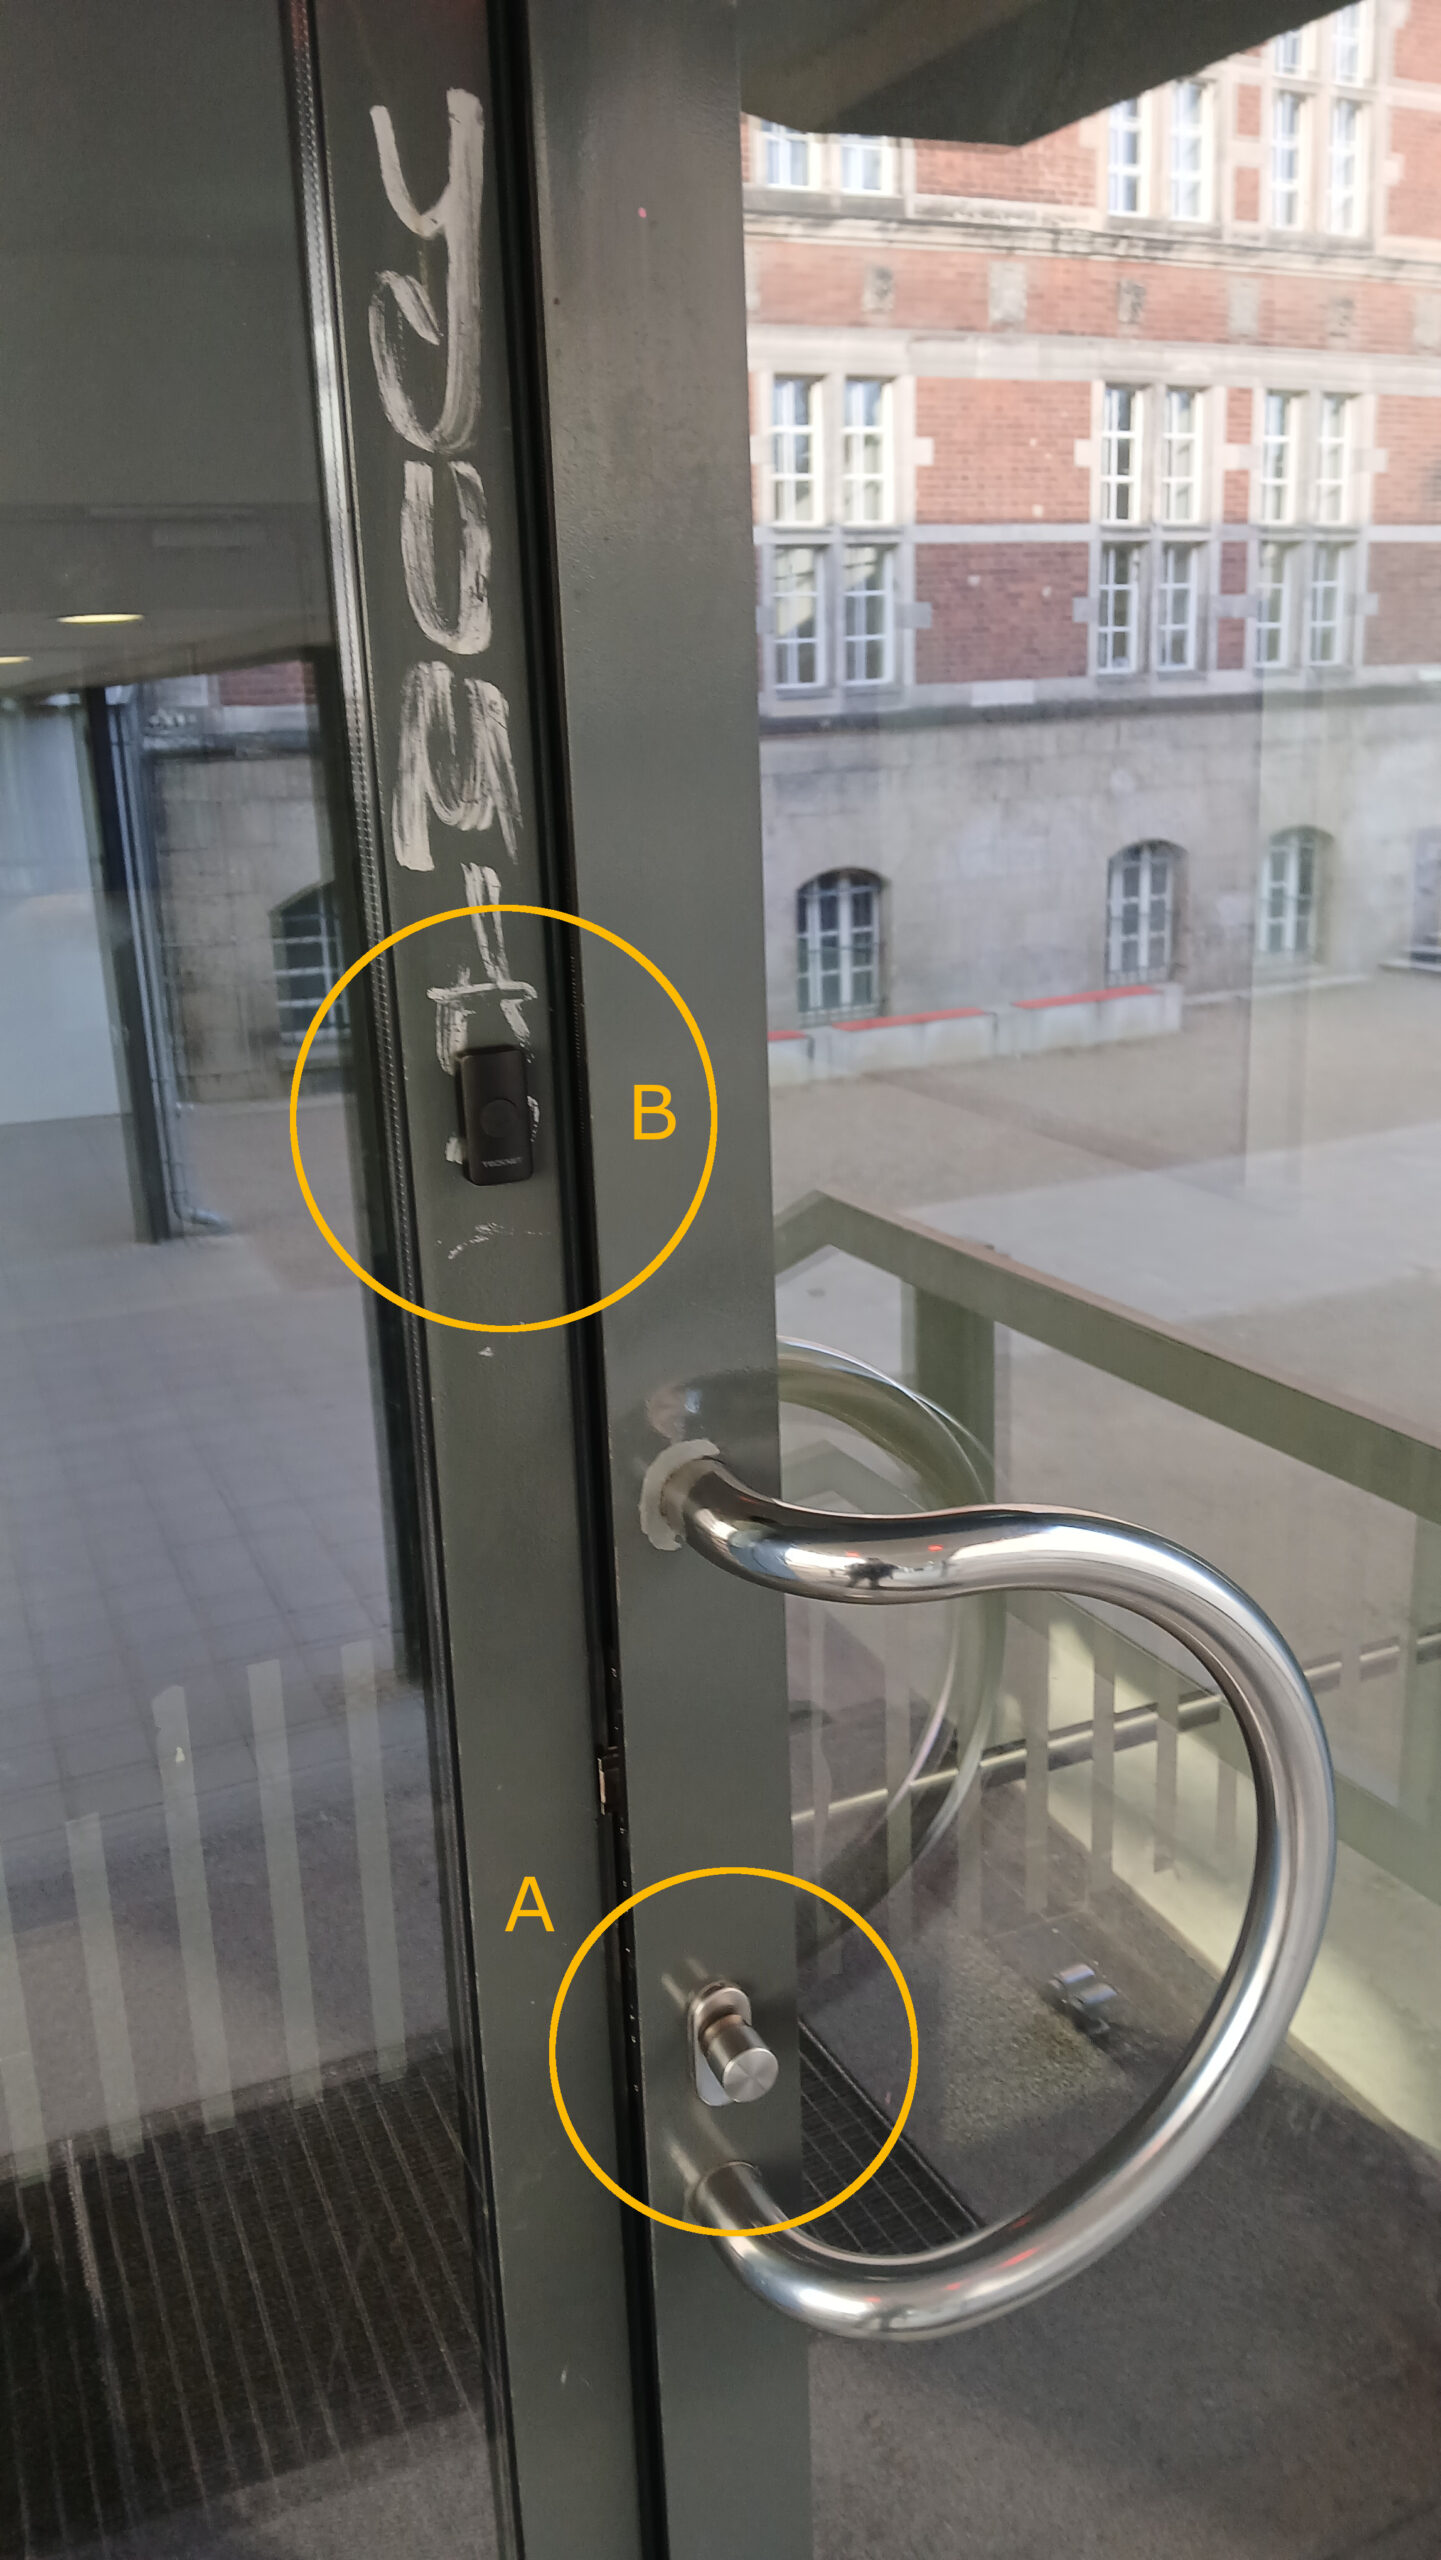
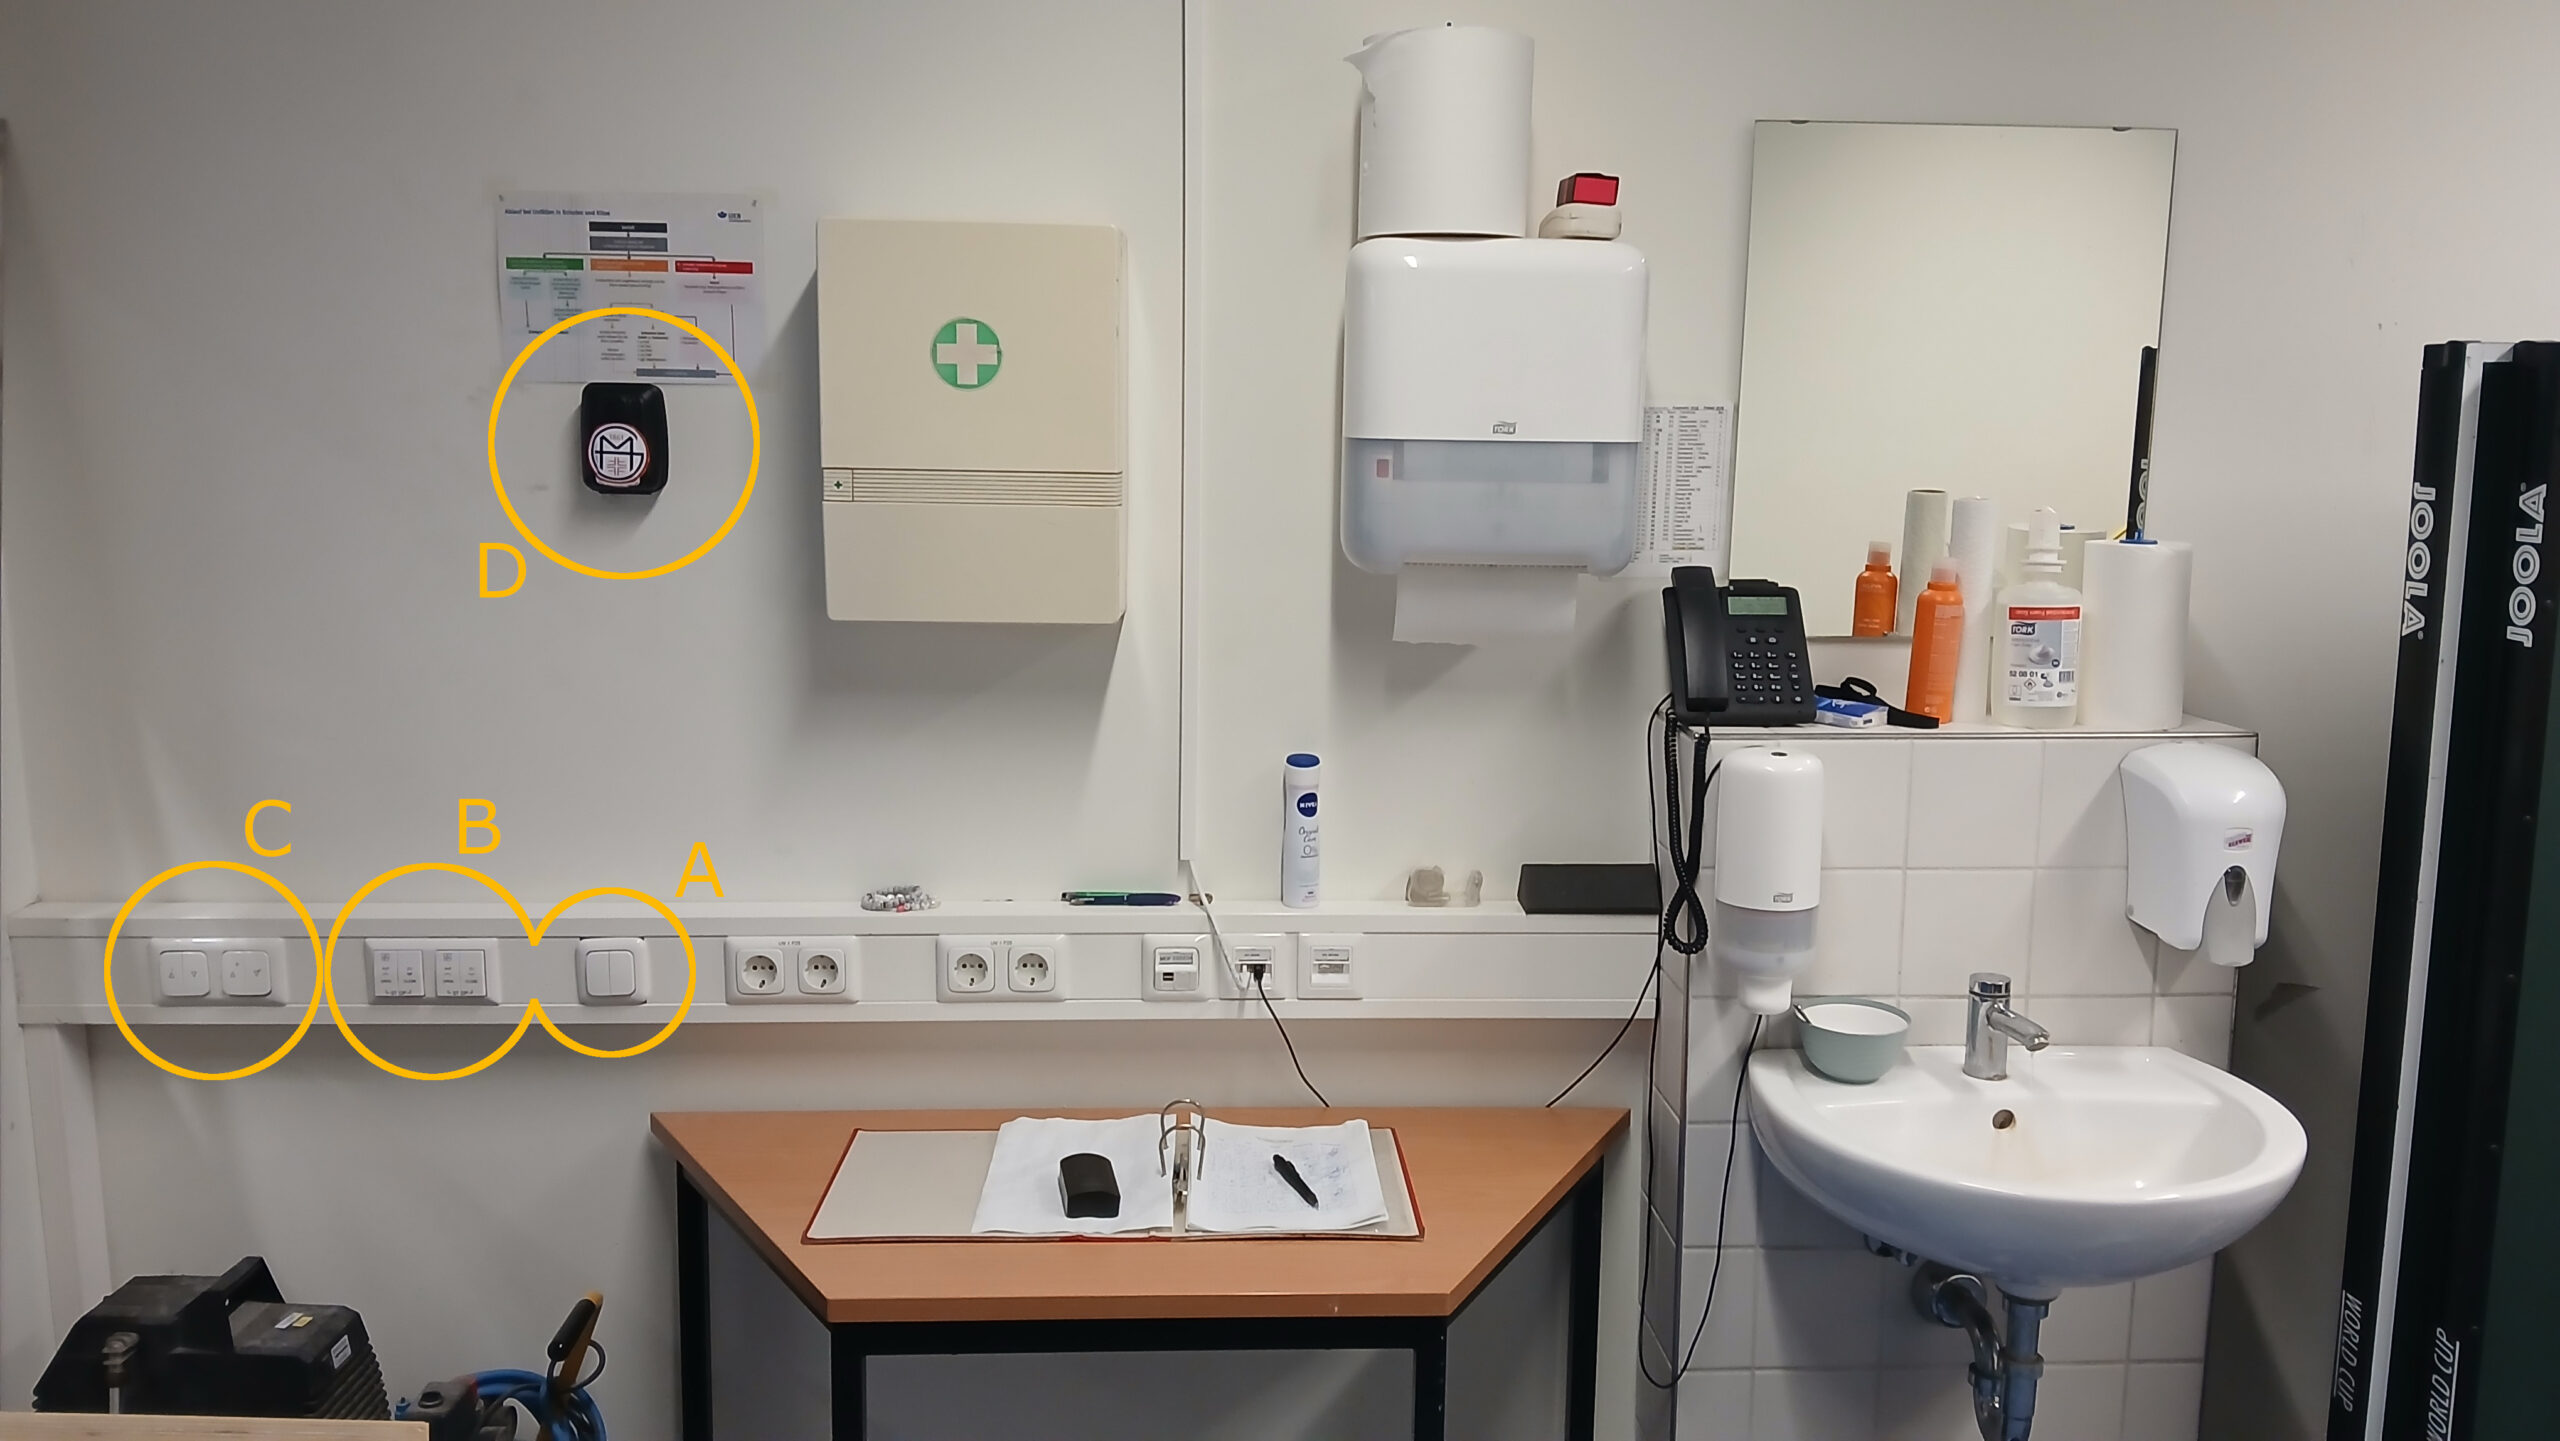
- Press the button on the key fob (see photo: A) near the metal knob on the door (see photo: A) for a moment until you hear a soft beep.
- Then turn the metal knob and open the door.
- Note: Always let the door close completely (risk of theft)!
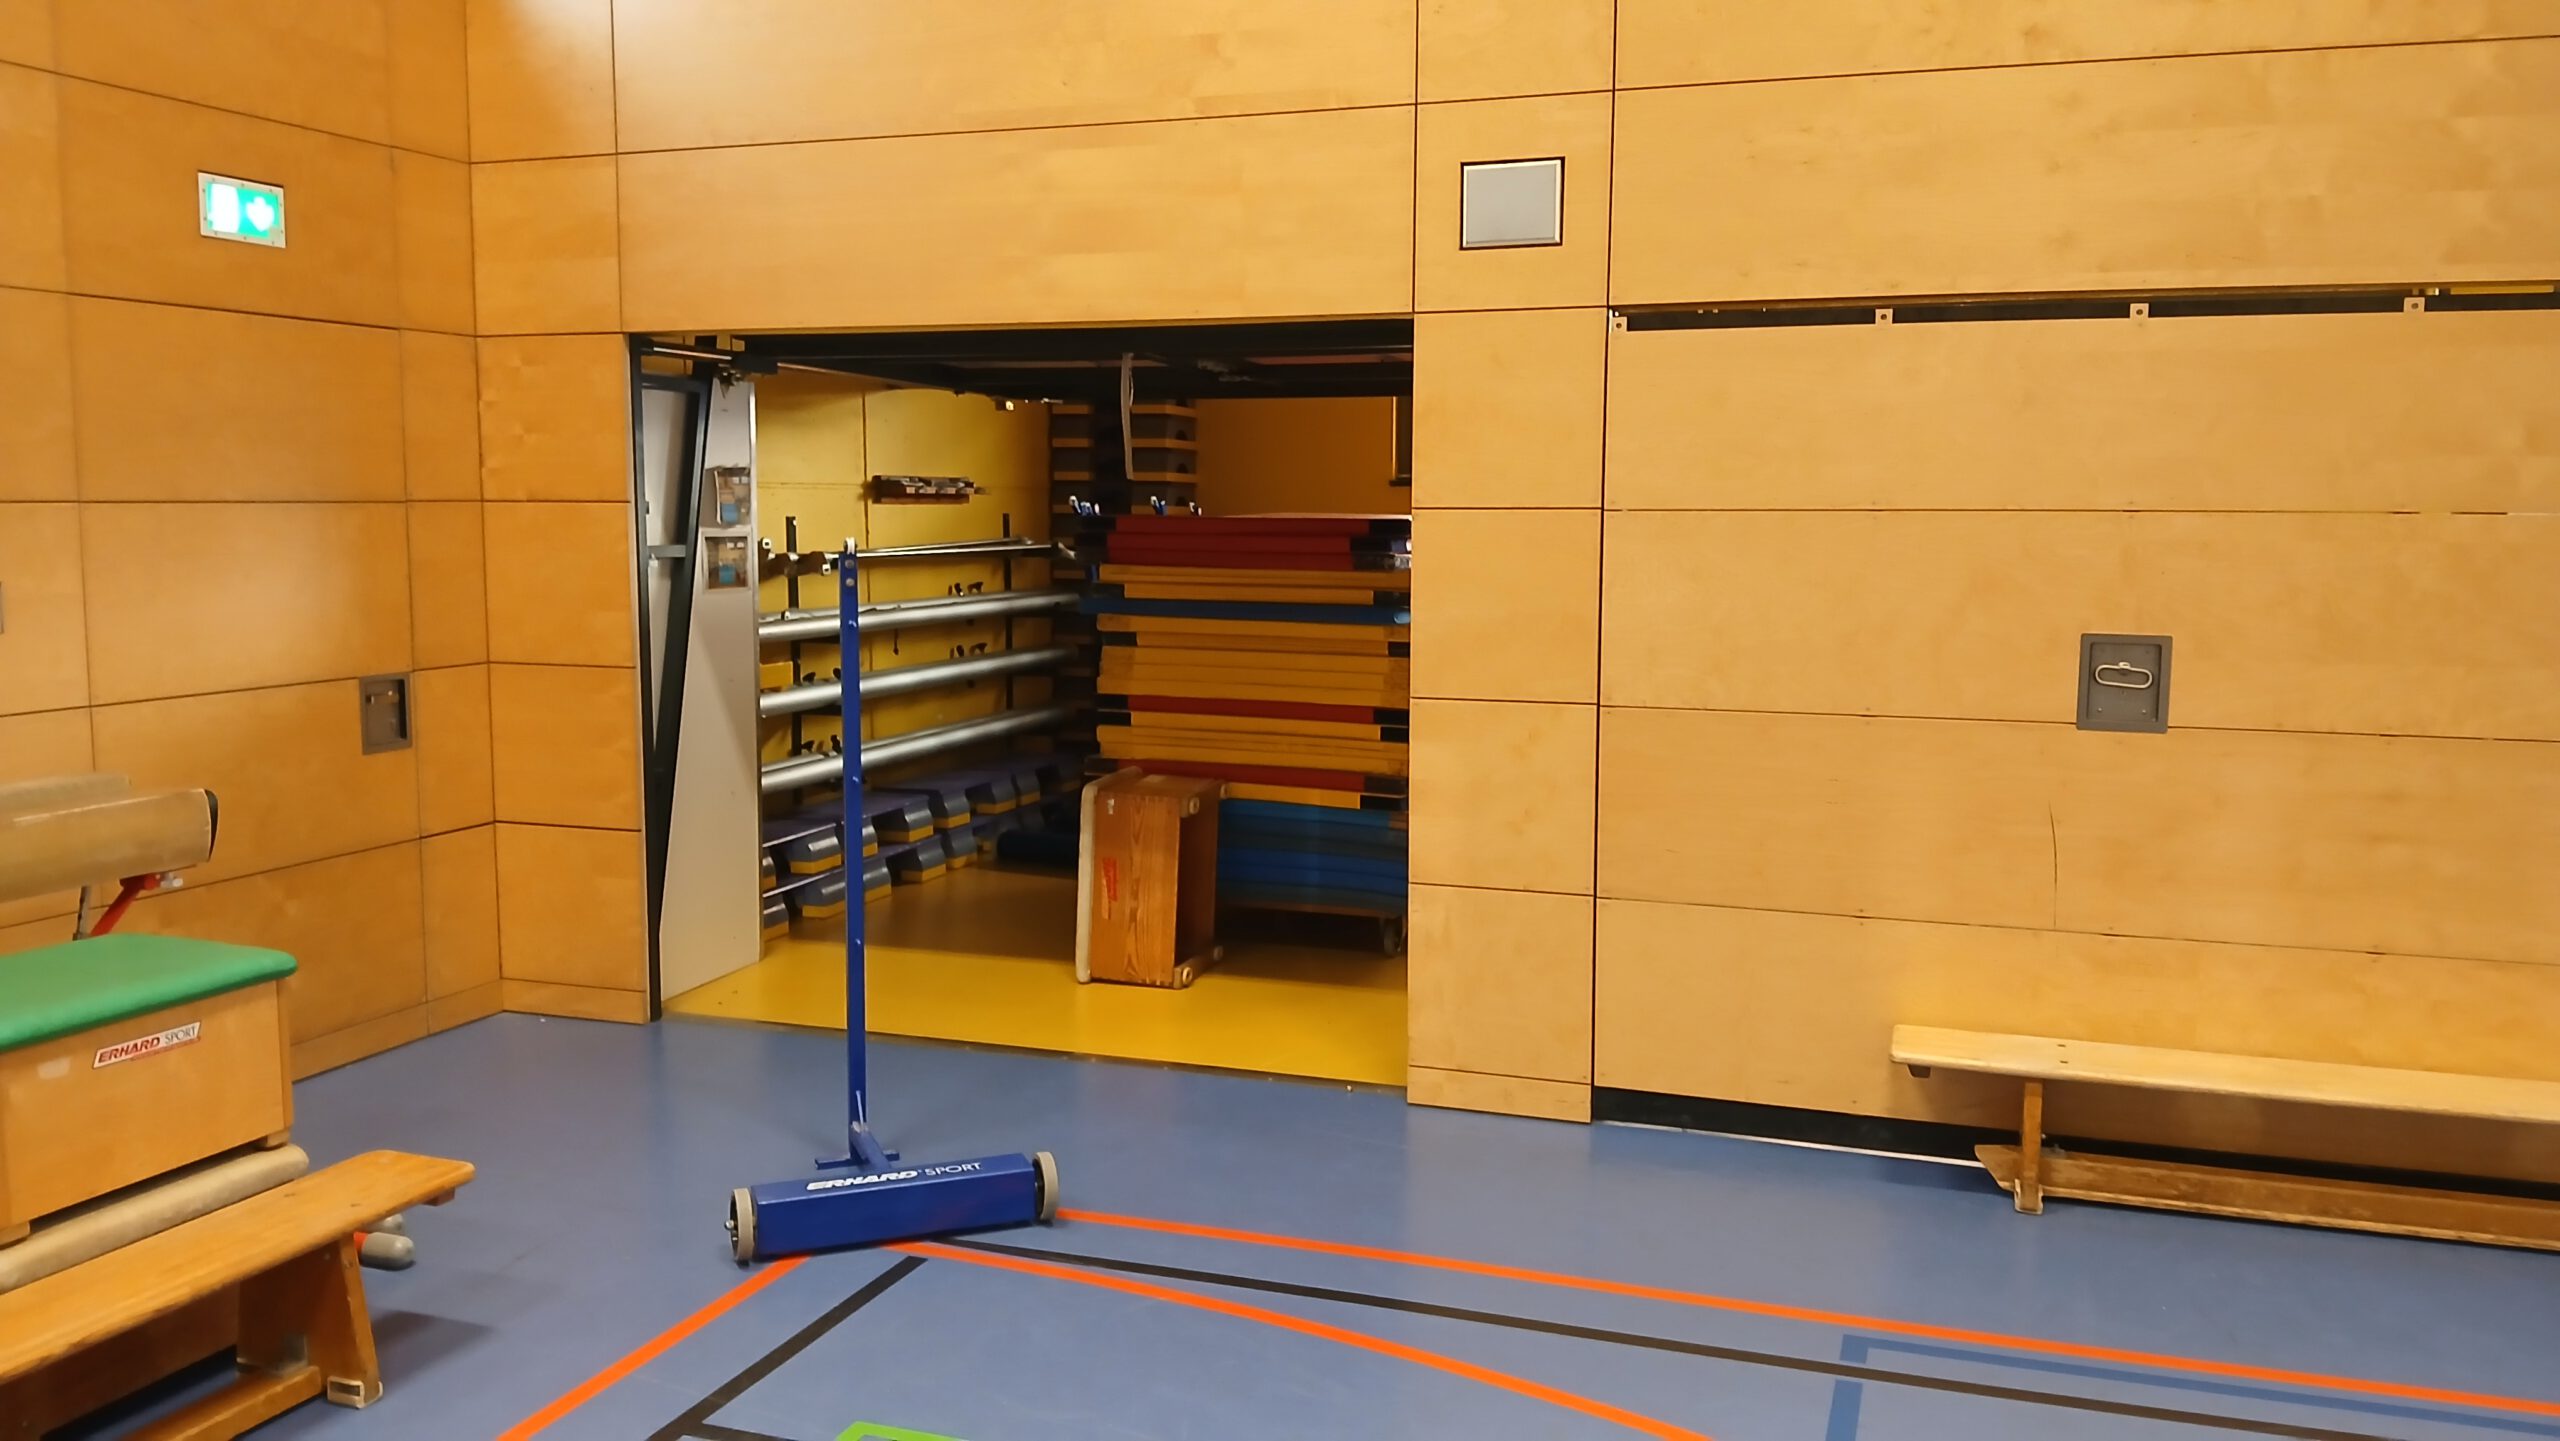
2. Get the Box from Downstairs
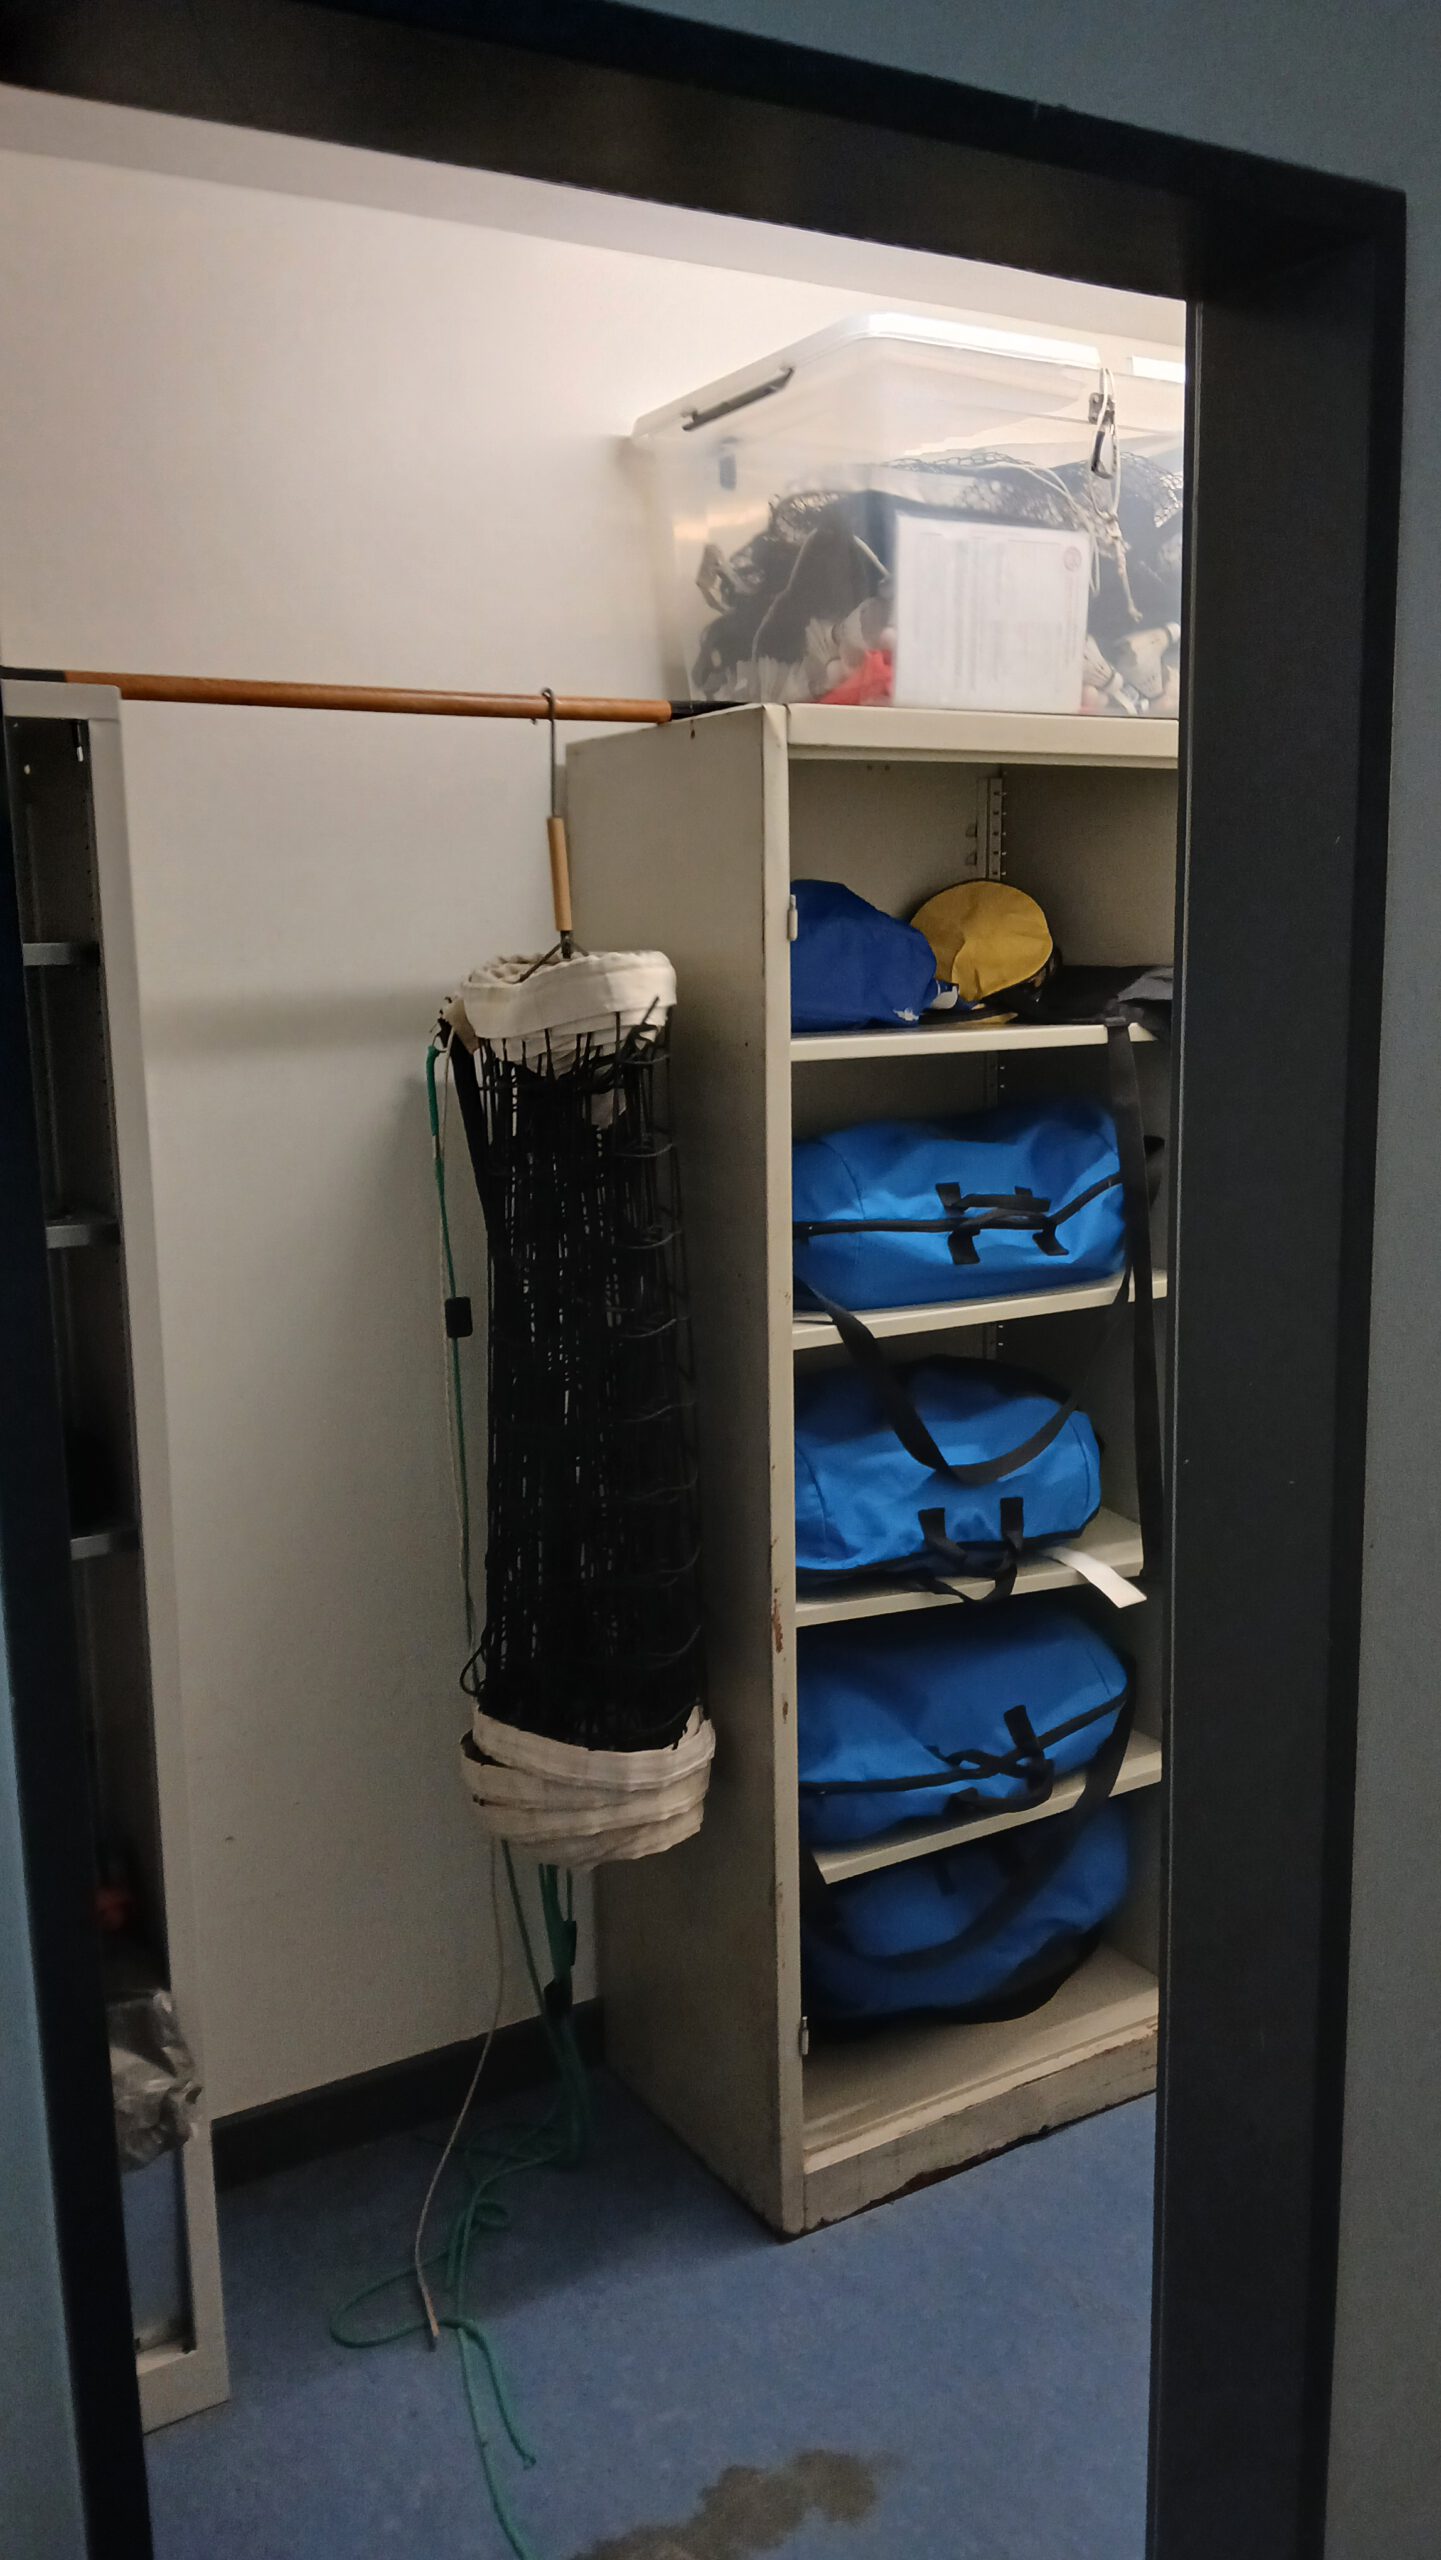
- The box containing the equipment is located in the basement, coming from the stairs, in the right-hand corridor (towards the men’s changing rooms), in the equipment room (third door after the glass door).
- The box is sometimes on the floor, sometimes on top of one of the cabinets (see photo).
- Simply grab the entire box and take it upstairs to the hall (you may need to wait until the users ahead of you have finished – see photo).
- Always lock the equipment room door, even during games.
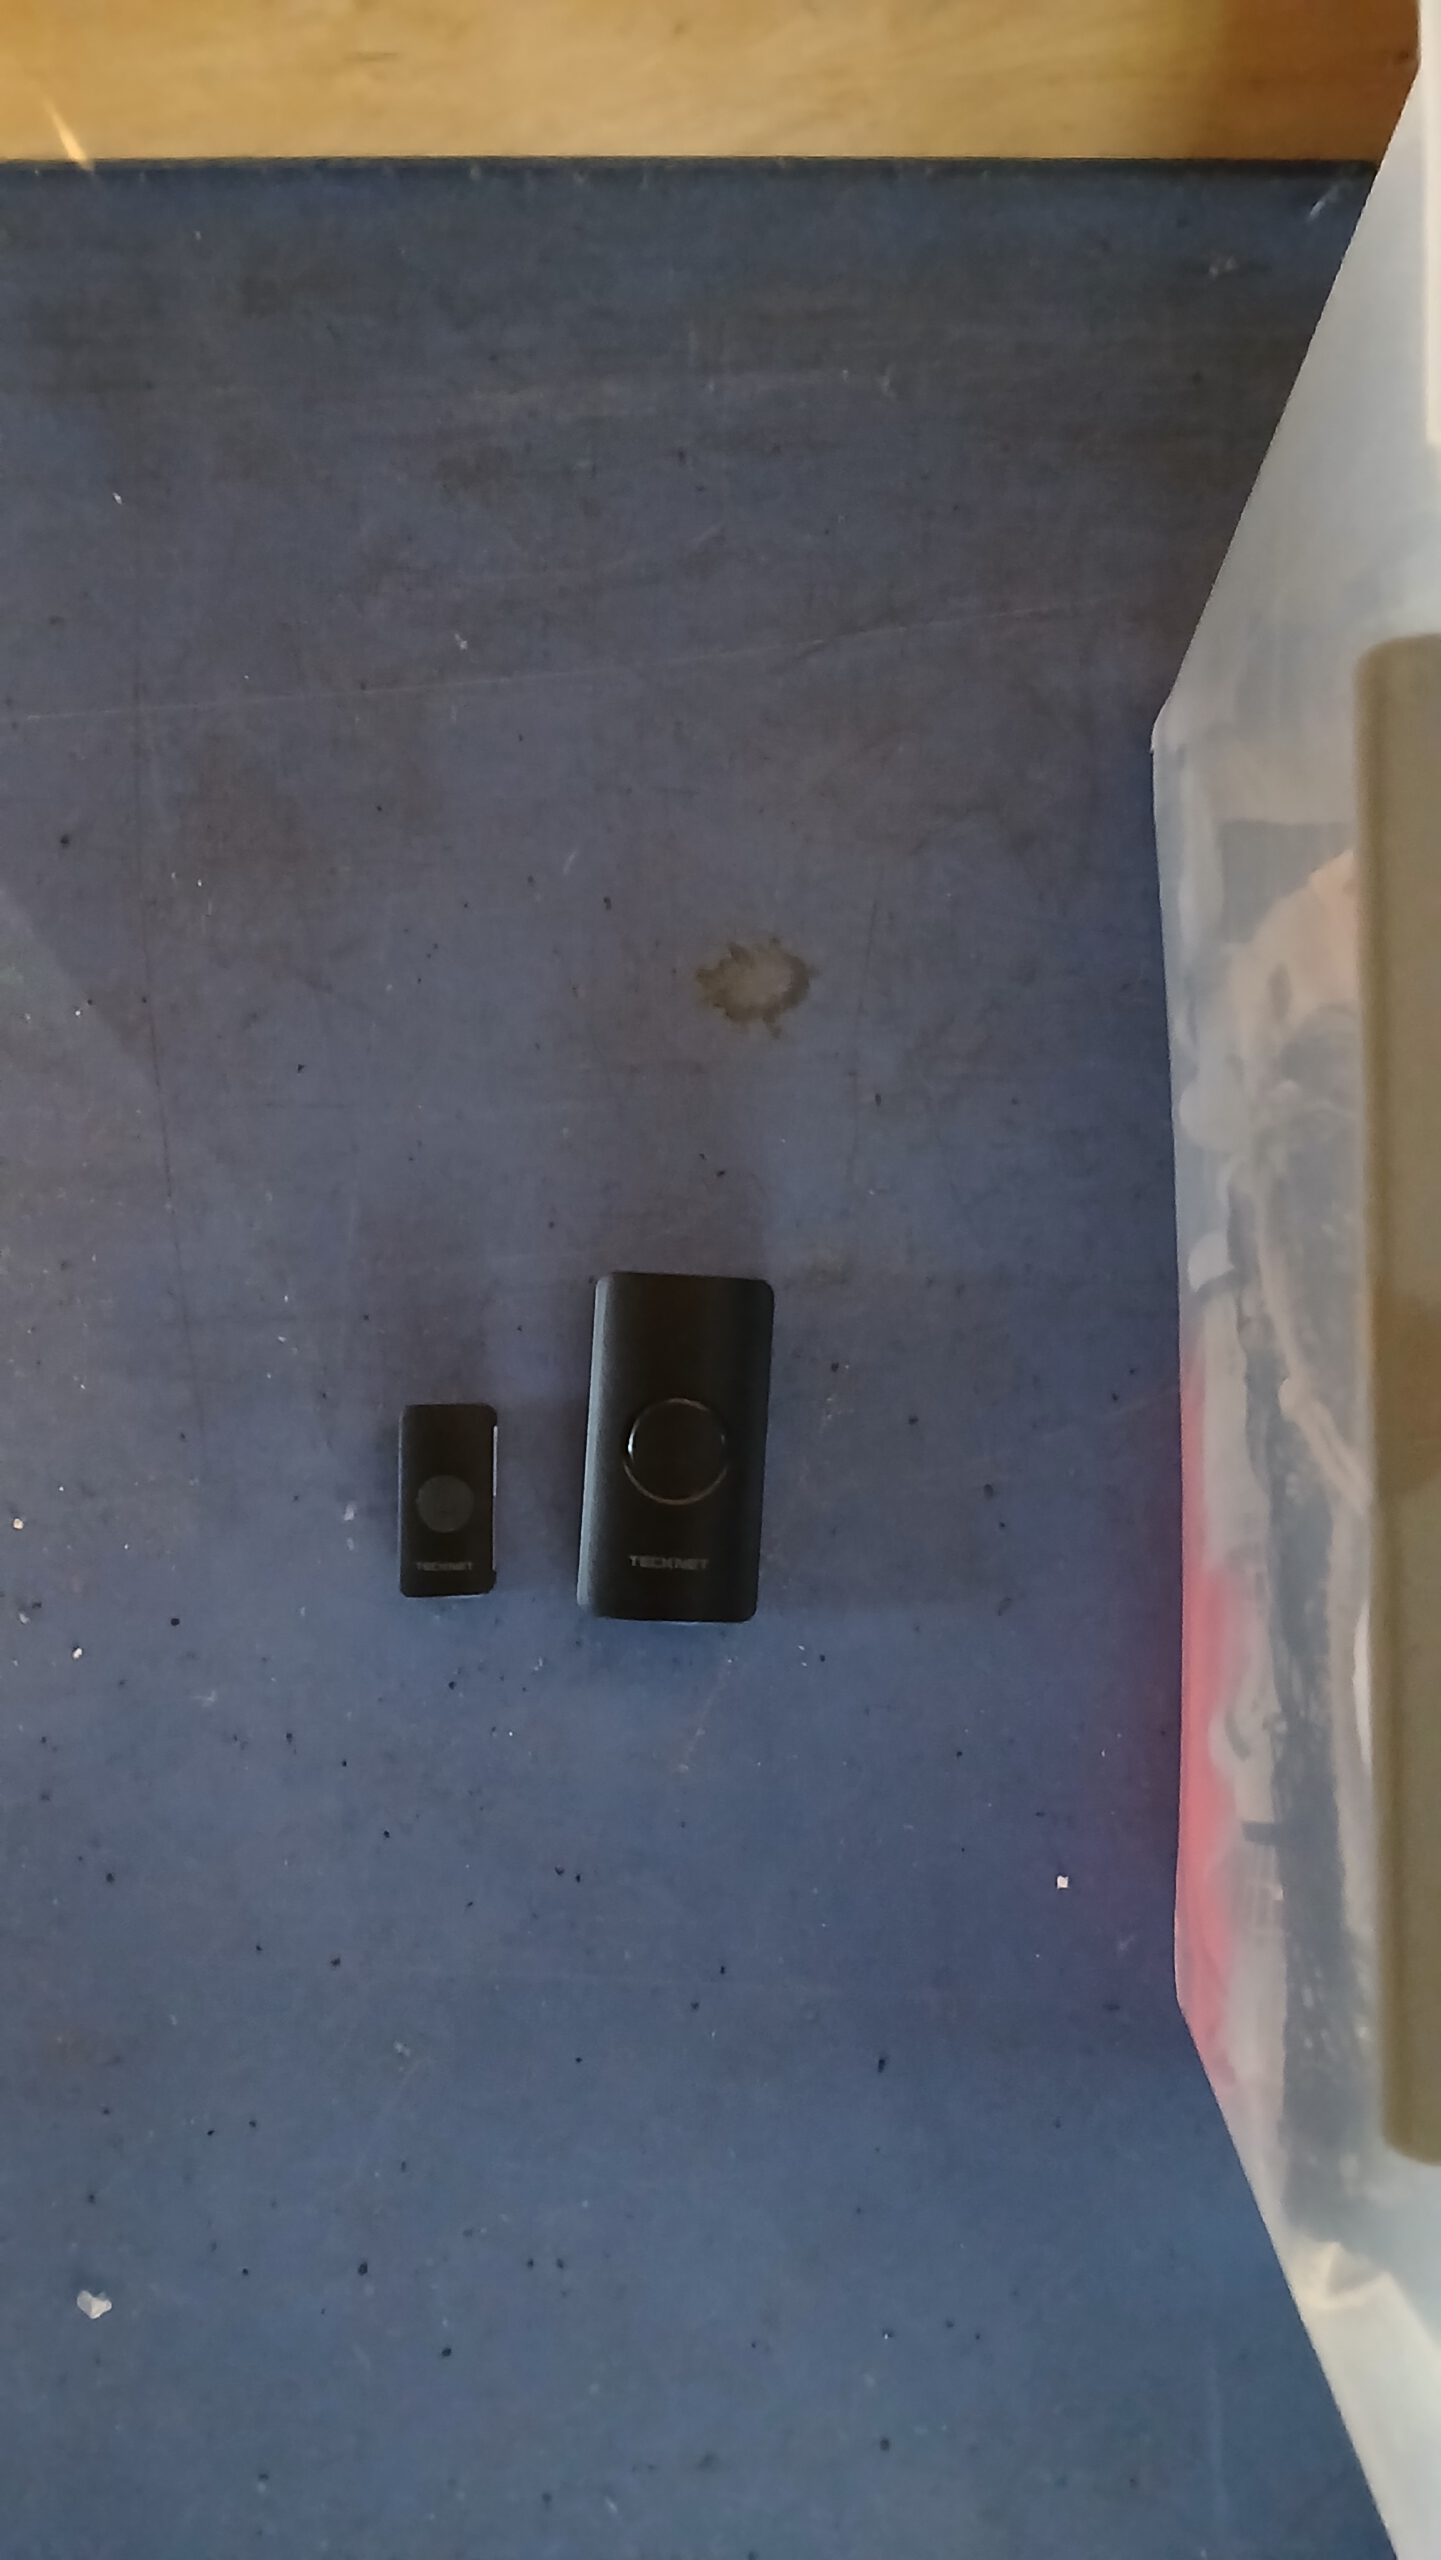
3. Install the Doorbell
- Inside the supply box, you will find a doorbell and a doorbell button (see photo).
- Simply leave the doorbell unit itself (the large black box) lying near the box.
- Attach the (magnetic) doorbell button to the wall next to the door (see photo: B).
- This allows players arriving later to announce their presence without having to leave the door standing open.
4. Lighting / Windows / Blinds
In the teachers‘ booth, there are switches on the wall next to the window facing the hall (see photos A, B, C).
- Lights (A): Usually already on; otherwise, simply press briefly.
- Windows (B): It is recommended to briefly open the windows to air out the room during setup. Unlike the lights, it takes a moment to see whether the windows are responding. Briefly hold down the switch and observe the windows to confirm they are working.
- Blinds (C): The blinds take even longer than the windows to show signs of movement. The switches for the blinds also require a relatively firm press.
Caution: In strong winds, do not lower the blinds while the windows are open; the blinds are susceptible to wind damage and may trigger an emergency shutdown, potentially rendering them inoperable for several weeks. The blinds feature two tilt positions when stationary. To toggle between these tilt positions, simply press the switch briefly—either up or down.
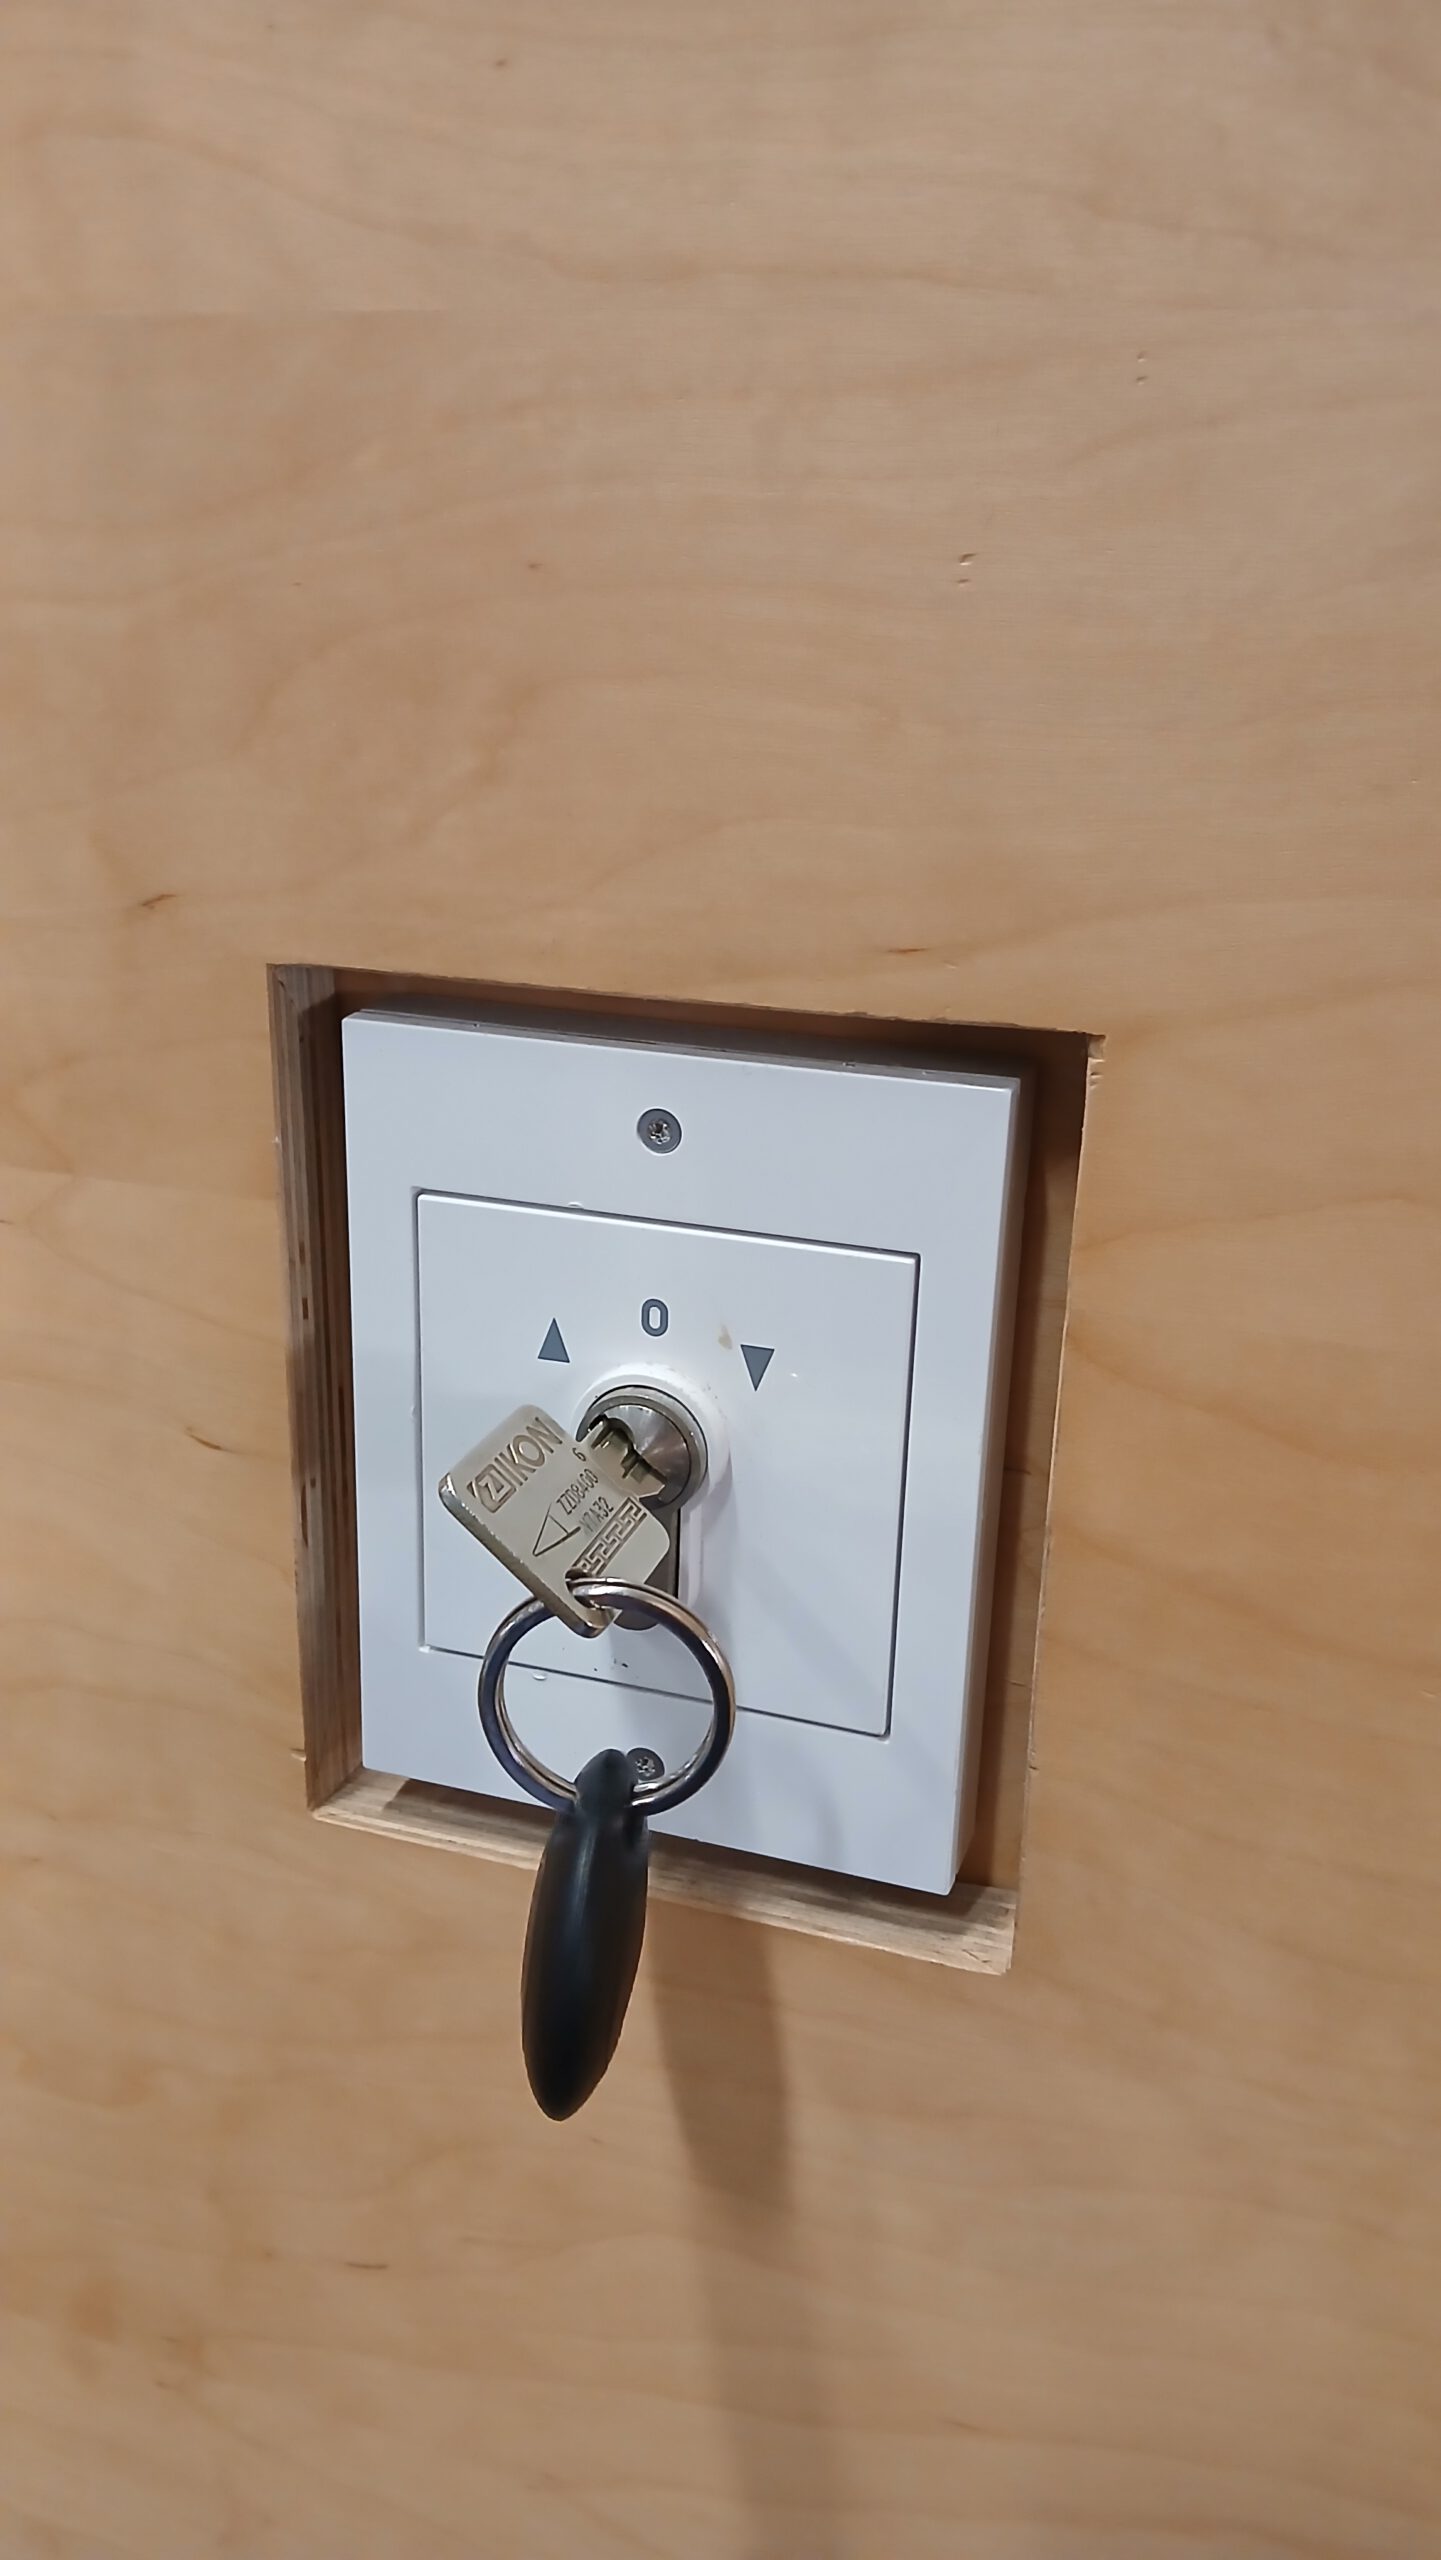
5. Open the Curtain
- The curtain may need to be raised.
- To do this, there is a control panel on the wall to the left immediately after entering the hall (see photo). You can use the hall key to raise the curtain with this panel.
- The curtain can remain raised after the game.
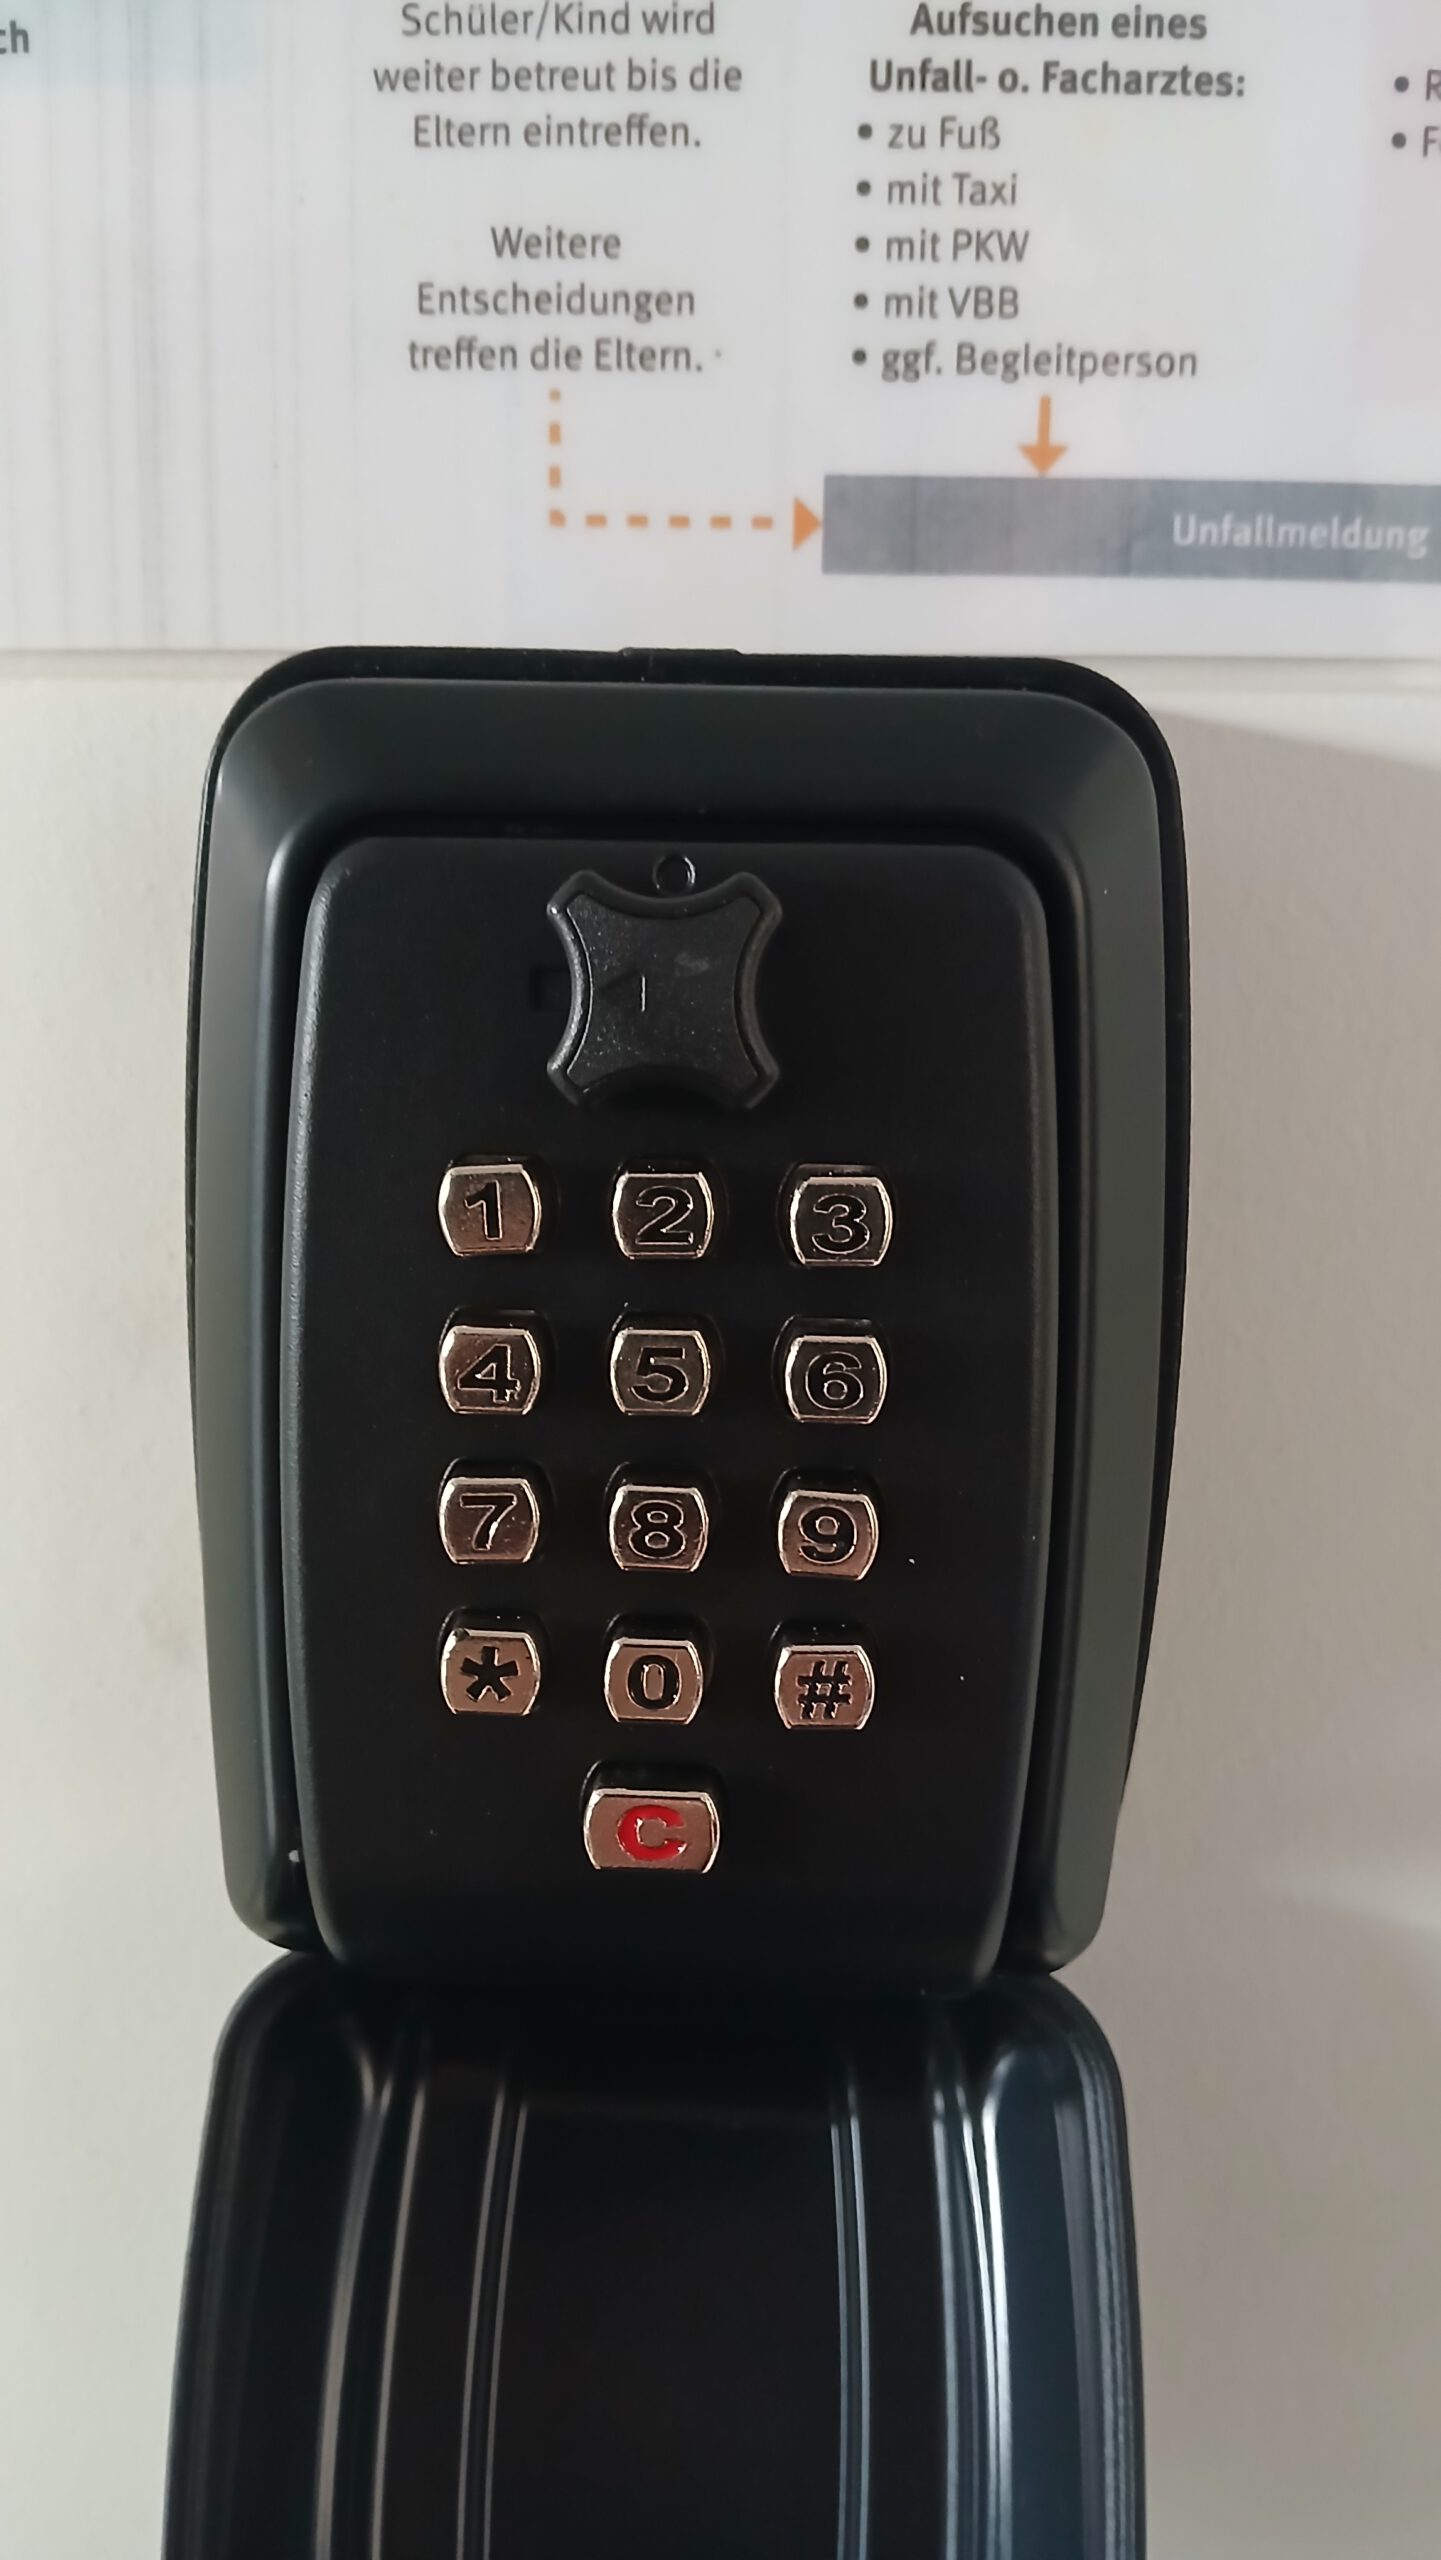
6. Unlocking Garage Doors
- The key for the gates in the hall is located in the key safe above the switches (see photo).
- The code for the key safe can be found in the group descriptions on WhatsApp and Signal.
- Simply open the safe, enter the code, and turn the latch on top to open it.
Note: The key must remain in the hall!
7. Setting up the Courts
- Get the metal supports (see photo) and center supports (see photo) from their respective garages.
- Position the metal supports in the hall as centrally as possible (see photo).
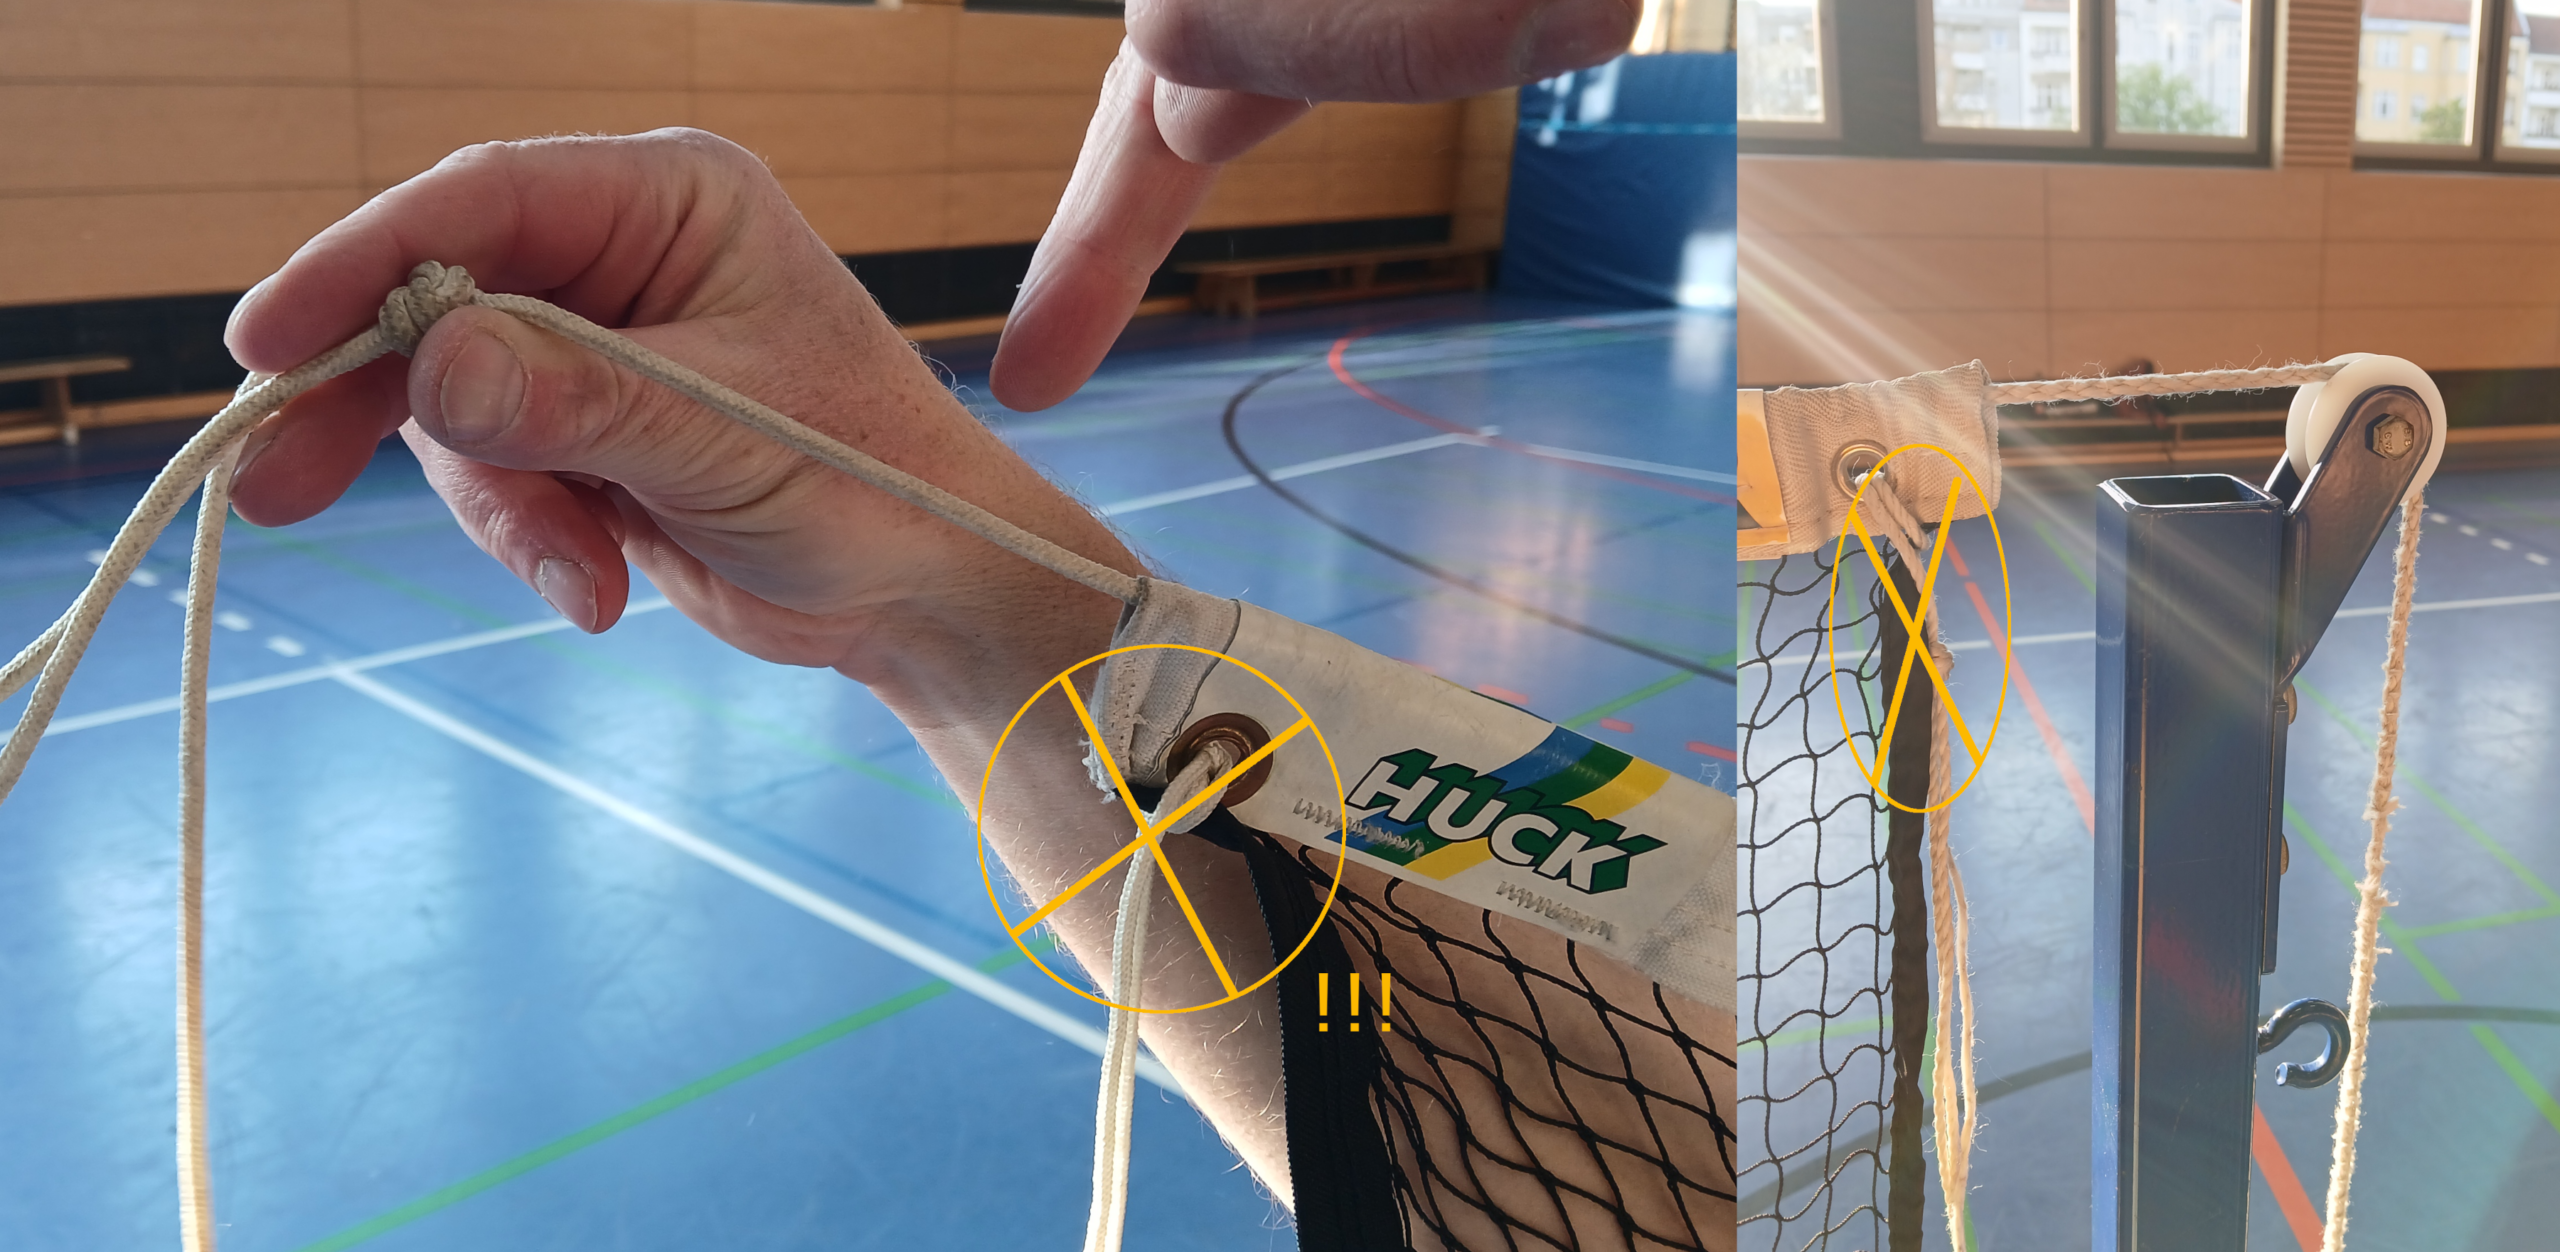
- Hang the net on the metal supports.
Caution: Only the line on which the net is threaded should be attached and tensioned. DO NOT use the guy lines in the eyelets, as this could tear the net (see photo)! - Place the net on the center support.
Correct height: The contact surface should be at 1.55 m, meaning the hook should clamp at 1.60 m. - Tighten the net by sliding the outermost metal support outwards (into the football goals) until the net is sufficiently taut.
- Attach the guy lines as desired… or not. 🙂
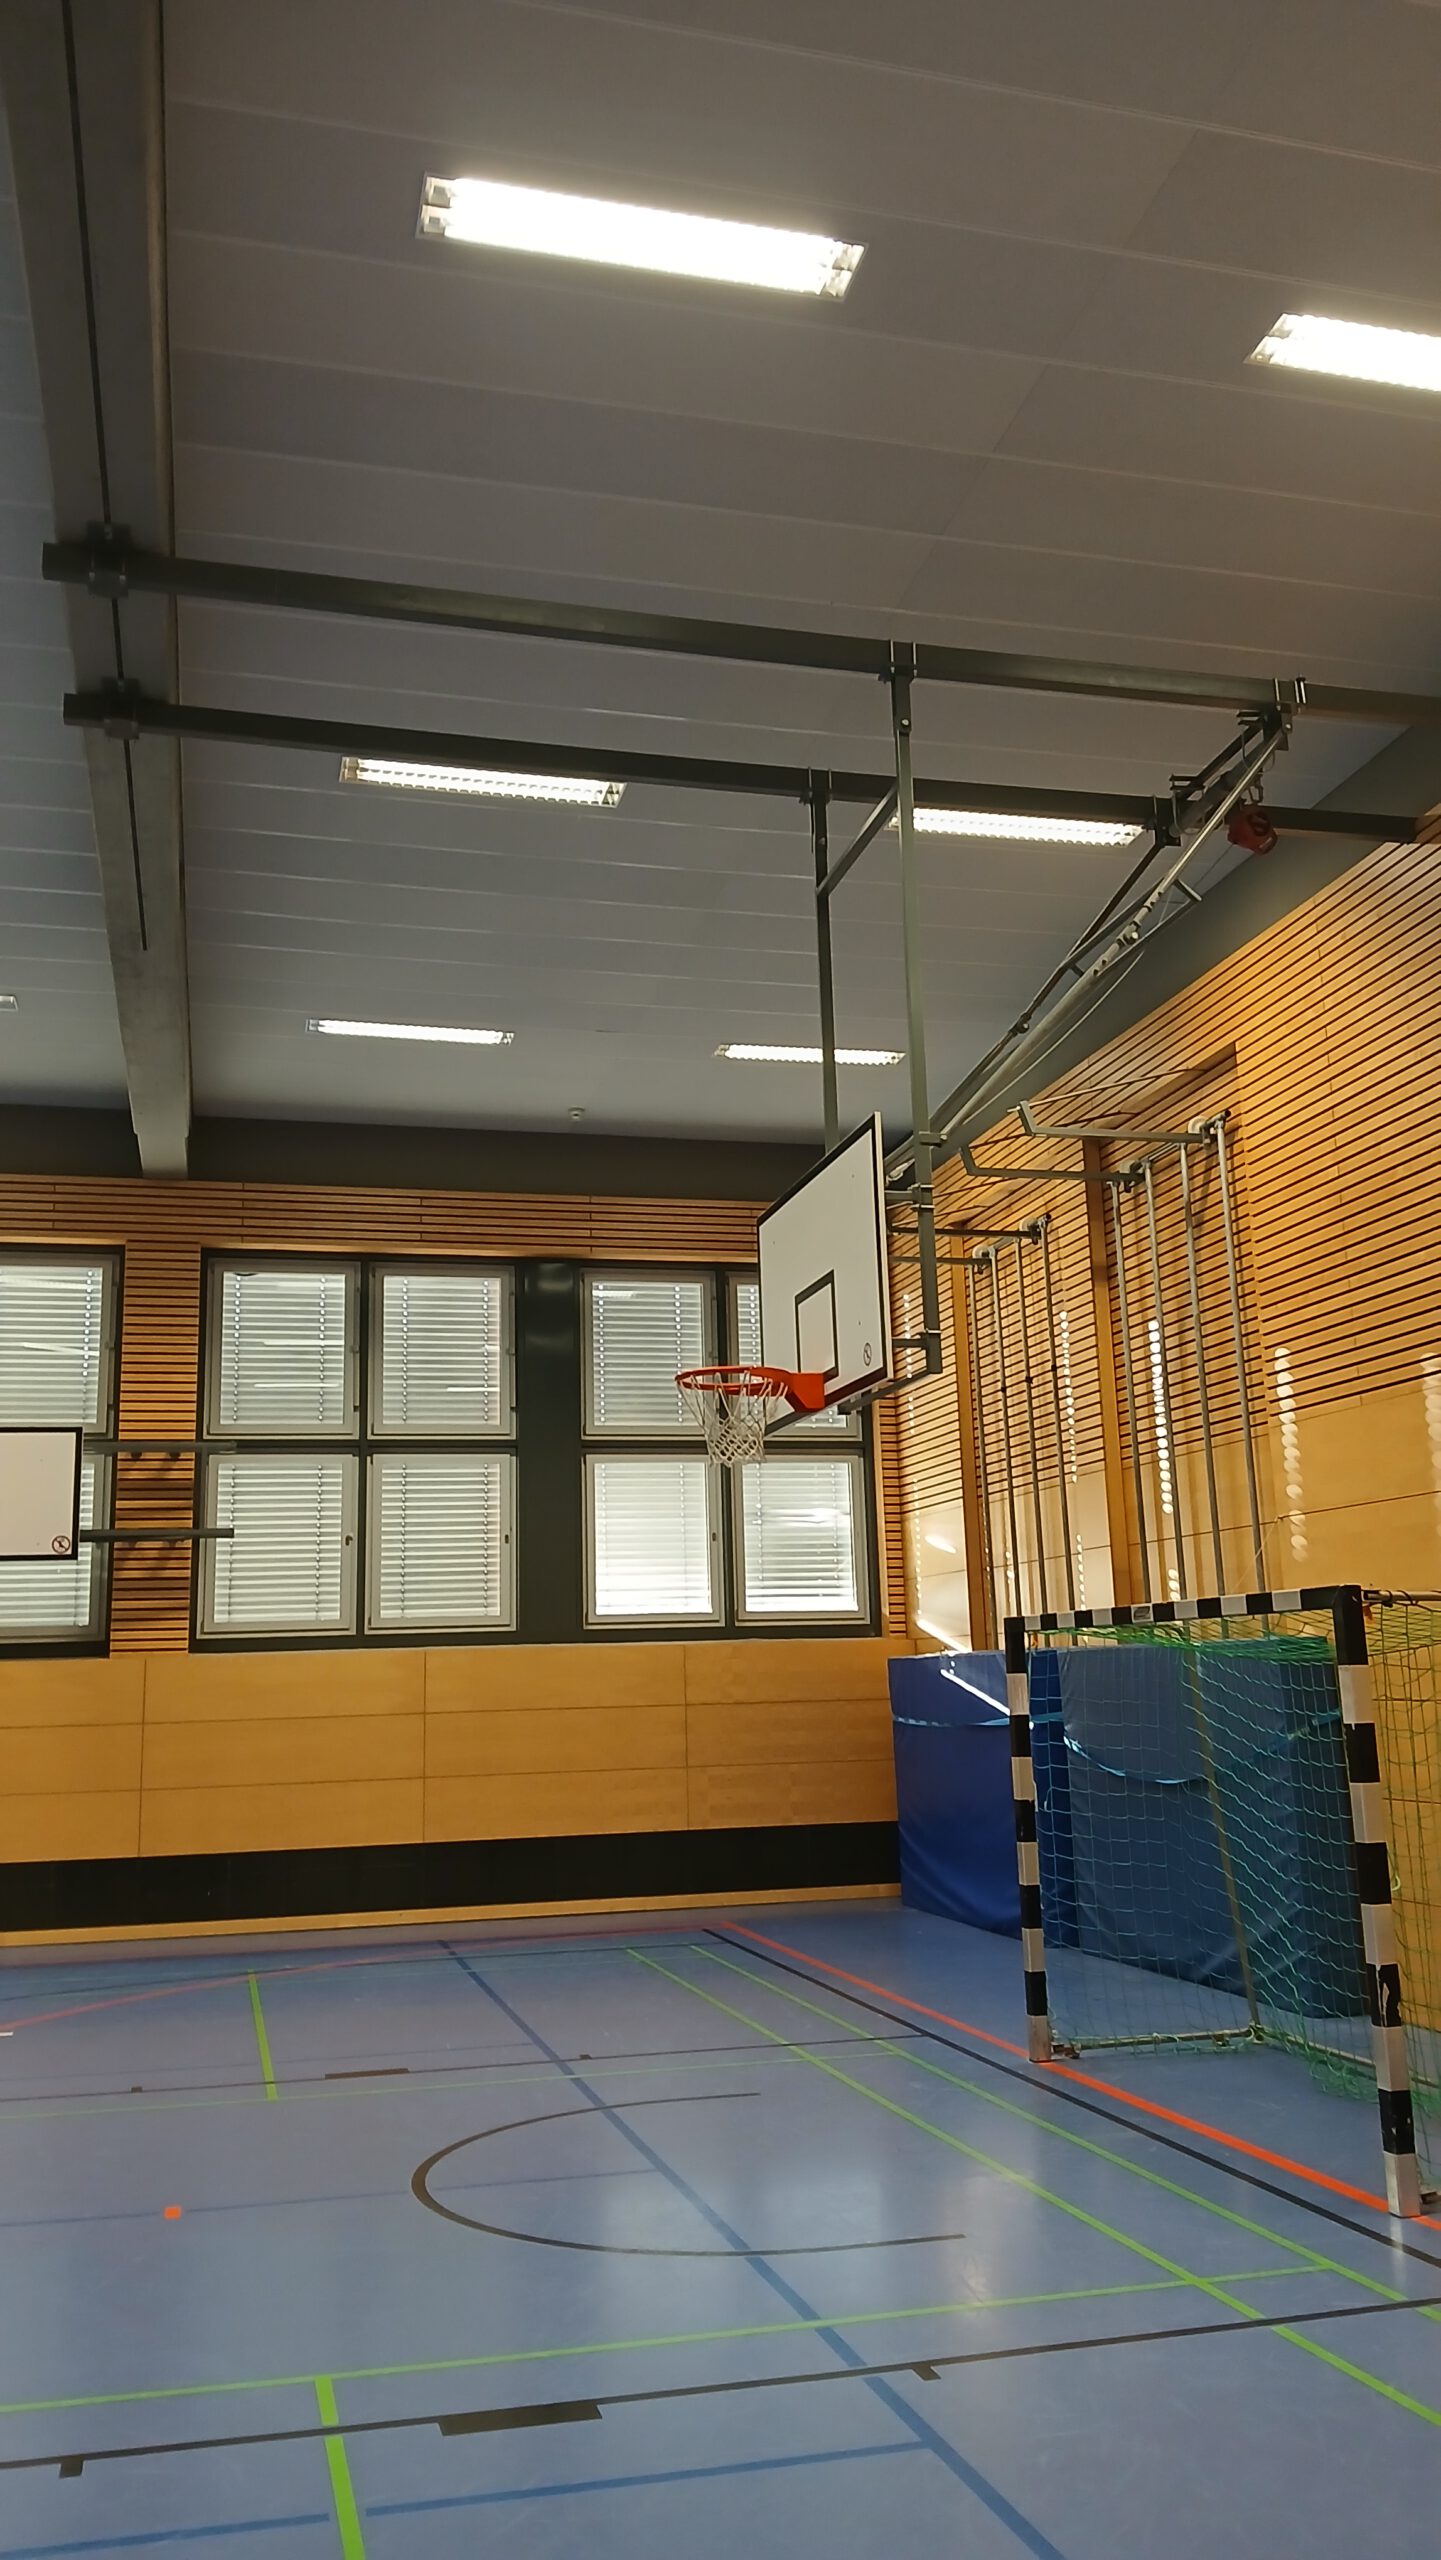
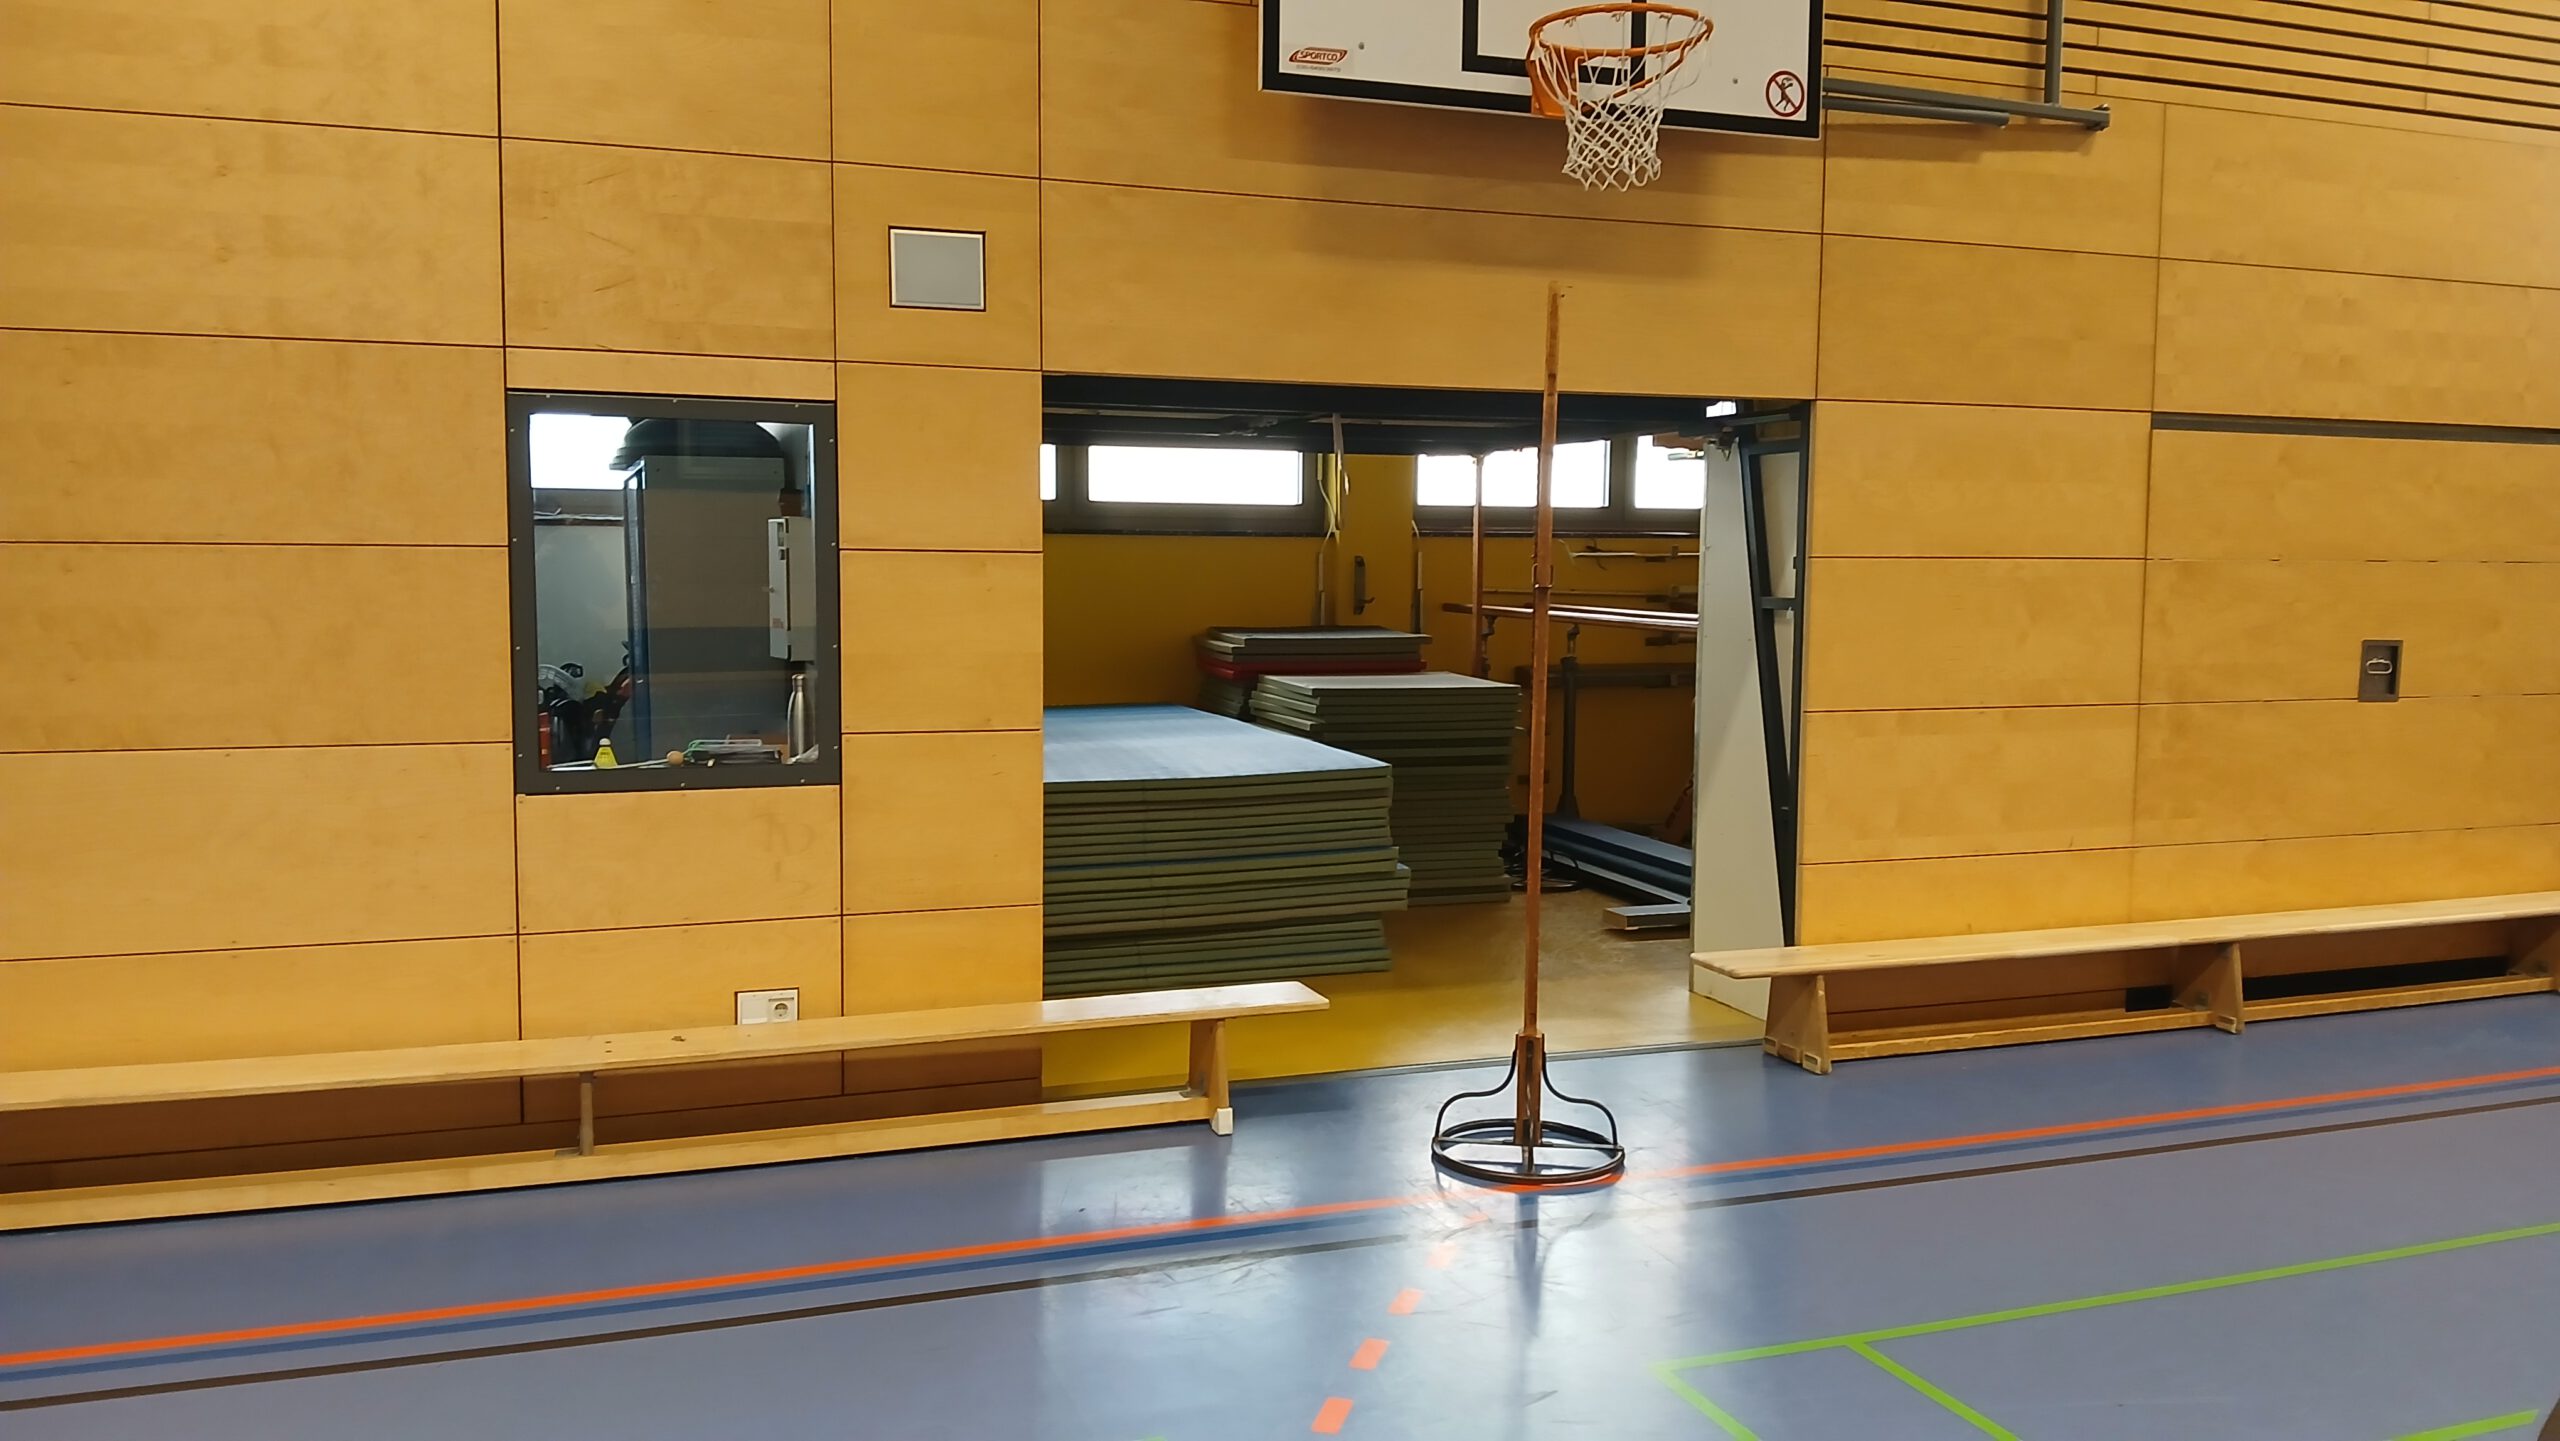
8. Basketball Hoops
- Occasionally, the basketball hoops are extended and protrude into the playing area (see photo).
- The four hoops along the long sides can be released and moved away using a crank handle (usually located behind the third garage from the left, facing the garages).
- The two hoops at the ends can be raised using the hall key and similar controls to the curtain on the respective side walls.
- We don’t need to put the basketball hoops back in place.
Dismantling / After the Game
Basically, the whole affair in reverse…
1. Dismantle Courts
- Take down the nets, fold them neatly, and pack them in the box.
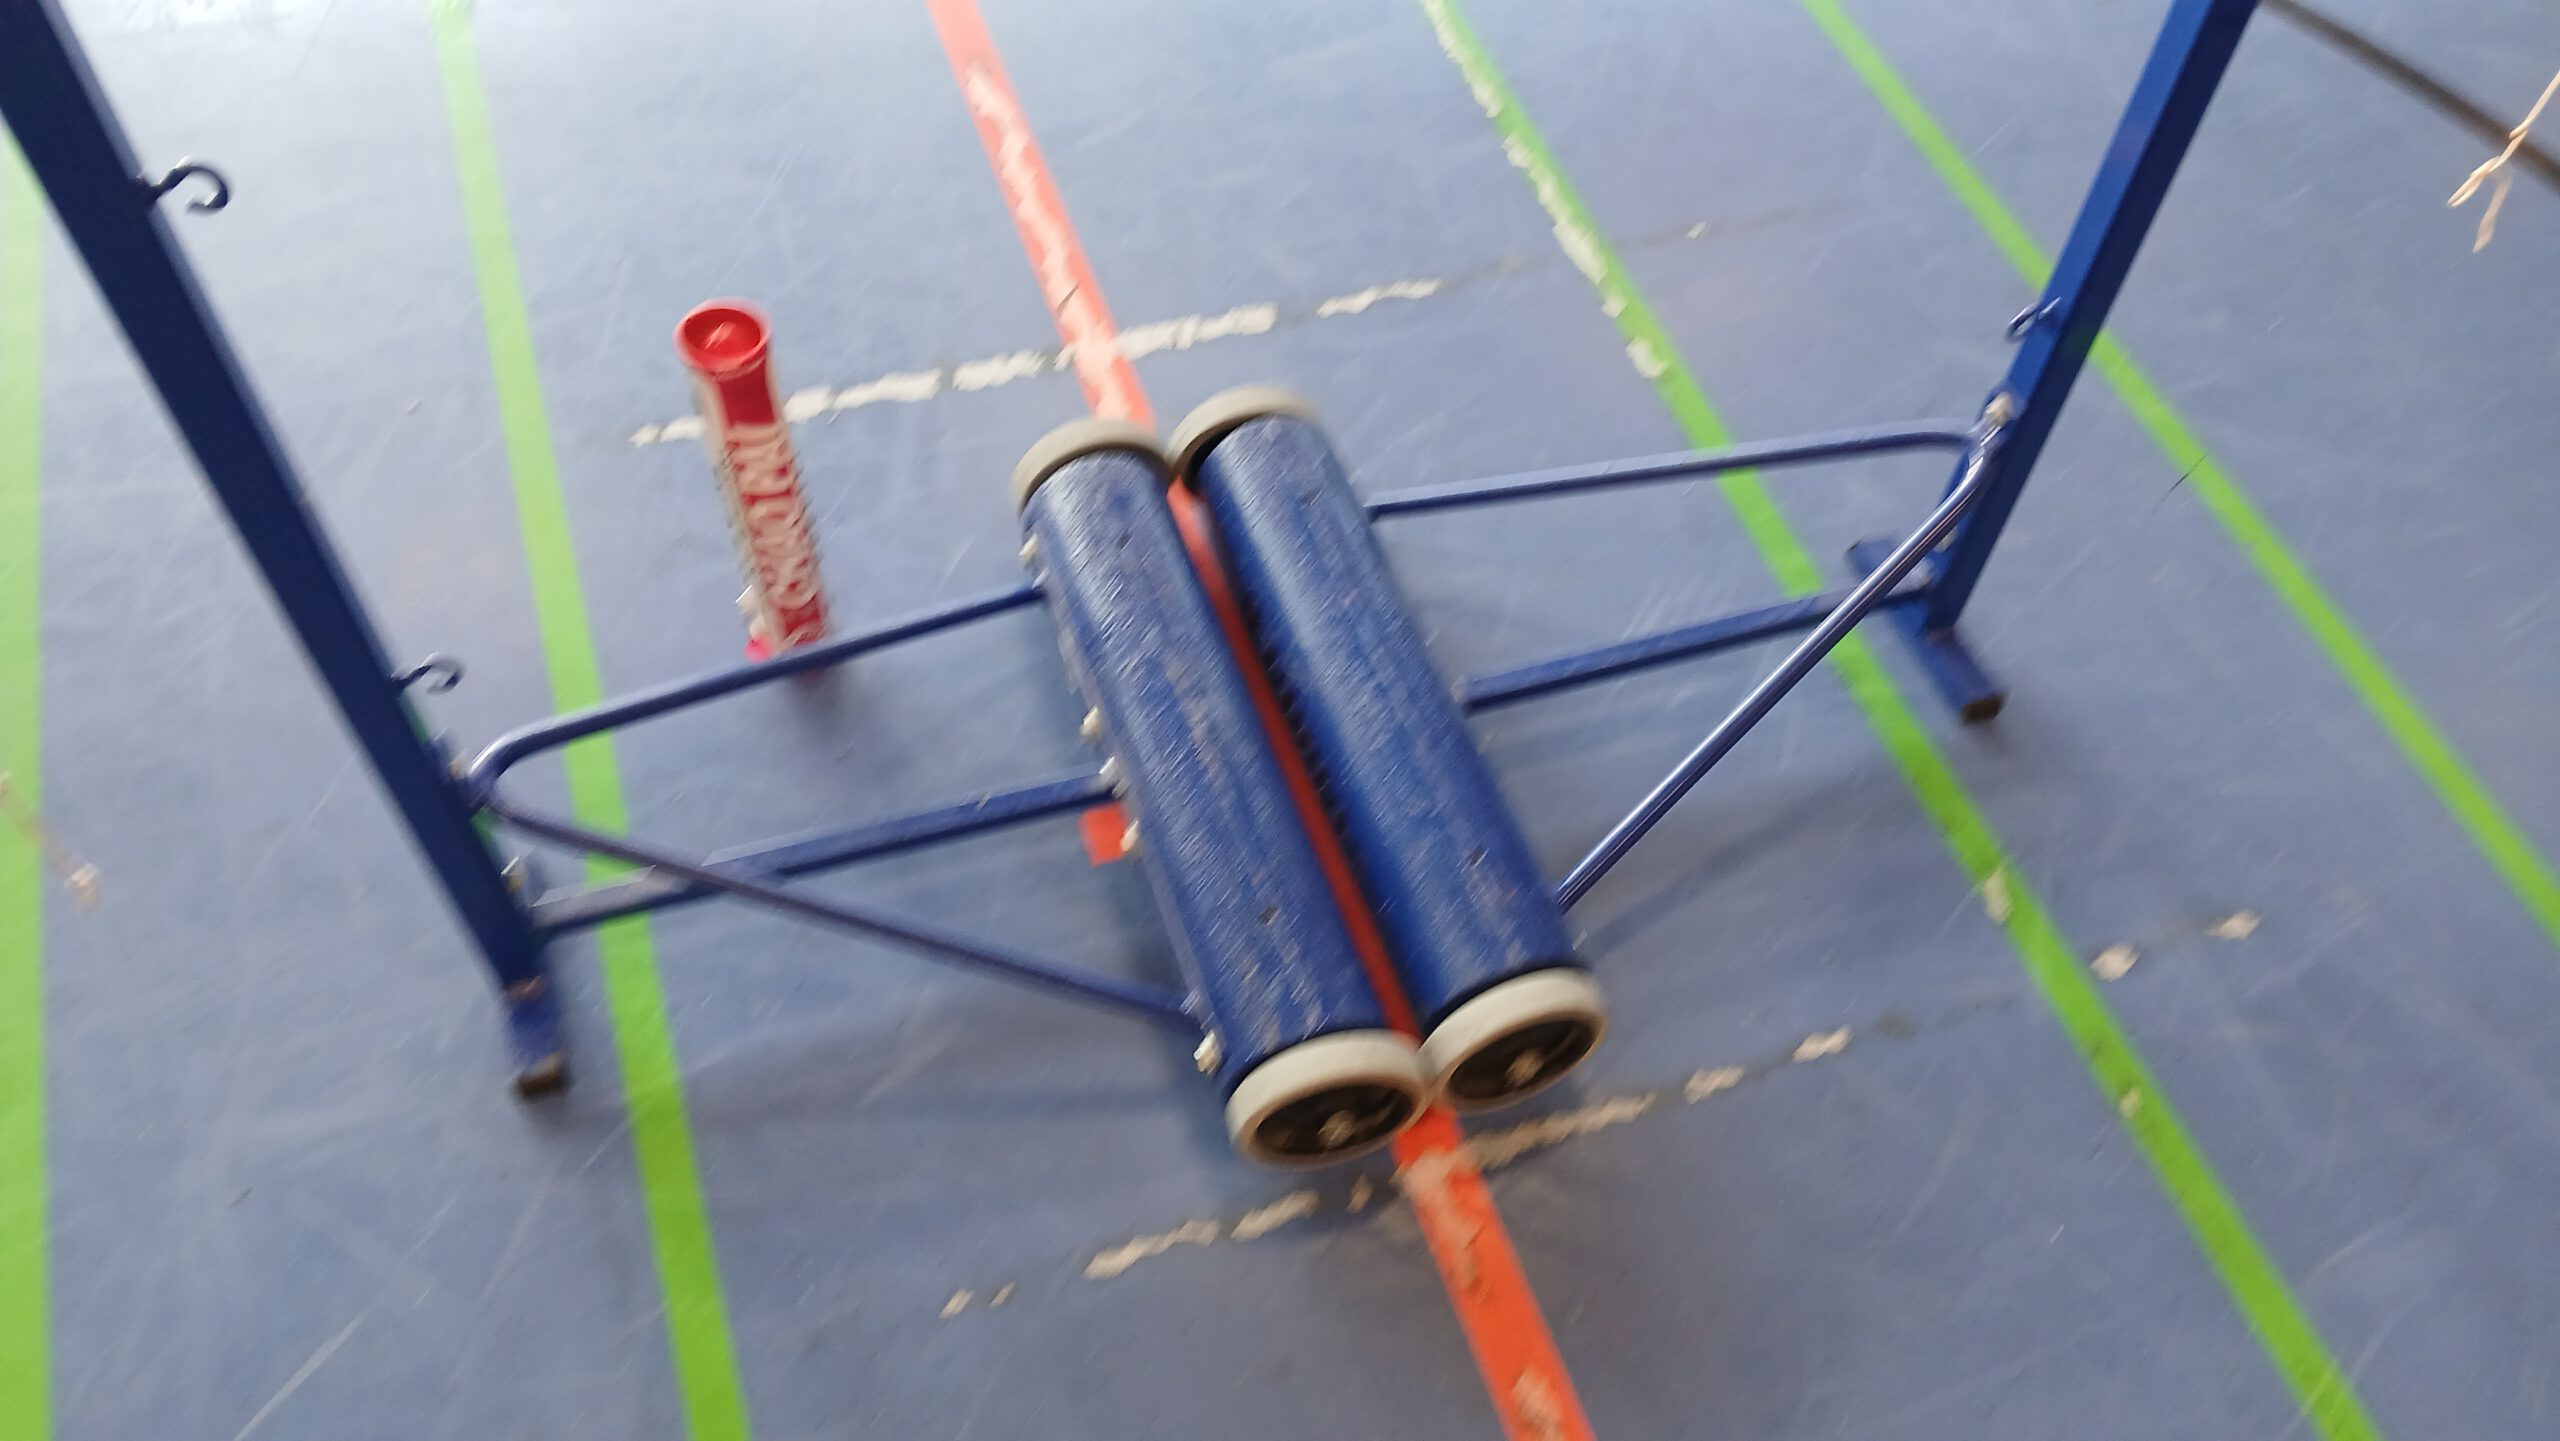
- Place the metal end supports and center supports in their respective garages.
- Collect and dispose of any remaining debris, such as pieces of springs.
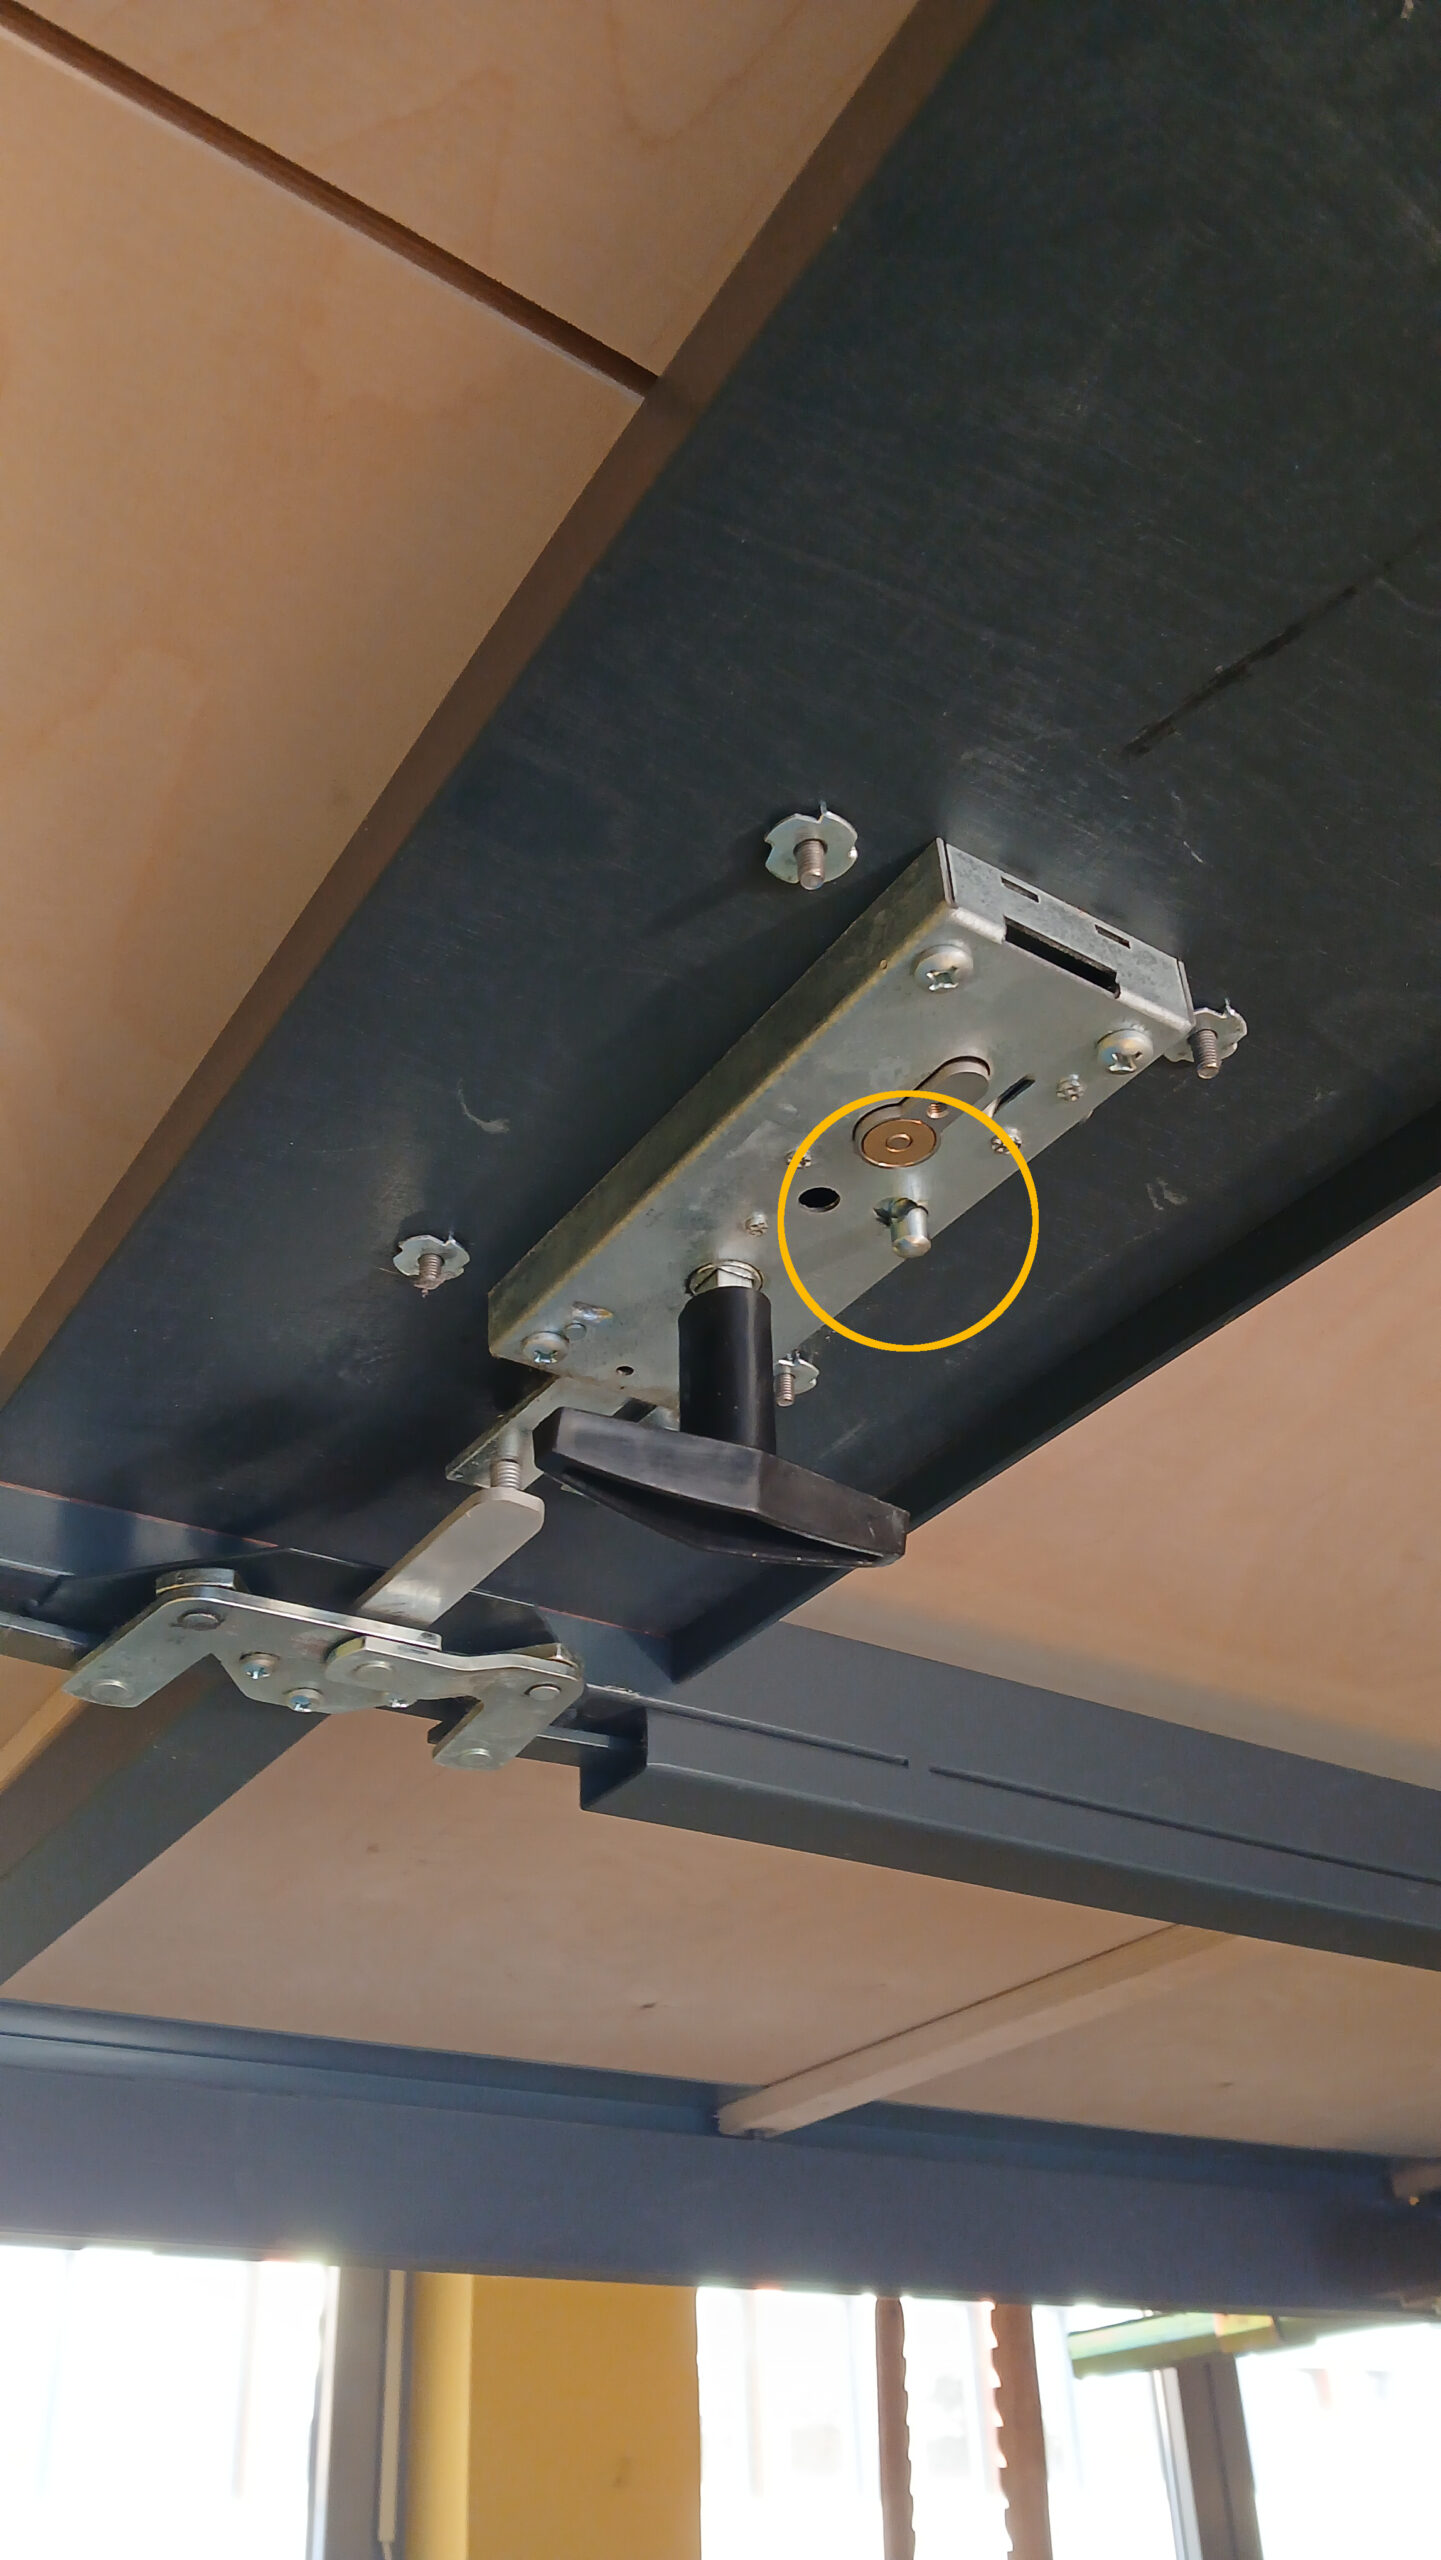
2. Locking Garage Doors
- Close and lock the garage doors. The latches are a bit special; the handle must not be left hanging halfway, otherwise the lock won’t engage, even if the key is turned all the way to the left.
Note: We lock both doors, even though only the right-hand garage door usually needs to be unlocked for setup.
Tip: You can also use the small lever on the handles on the inside of the doors (see photo). However, please avoid locking the doors this way and then leaving the key inside. 😀 - Place the garage door key (!) in the key safe: Open the safe using the code (found in the description of the WhatsApp and Signal group), insert the key, close the door, turn the latch, and close the lid.
Important: The garage door key must remain in the safe inside the hall!
3. Put the Doorbell away
- Get the doorbell button from the front door.
- Pack the doorbell and doorbell button into the box.
4. Stow the Box
- Take the box to the storage room.
- Lock the storage room (turn off the lights!).
5. Lighting / Windows / Blinds
- Raise the blinds.
- Close the windows.
- Turn off the lights.
6. Sign the Form
- There is a folder on the table in the teachers‘ room (see photo).
- Please fill in the following (ideally by the key holder):
- Date
- Time („18:30 – 22:00“)
- Club („GuMu“ is sufficient)
- Department („Badminton“)
- Signature
- Lock the teachers‘ room (turn off the lights!)
7. Leave the Hall
- We do not usually need to lock the hall separately (using the button on the hall key ring); simply closing the door is sufficient.
- The key holder must ensure the door is closed!
- Again: Lights must be switched off in the equipment room, the teachers‘ room, and the hall itself. All other lights are motion-activated.
Photos
Click on the photos to view them enlarged and zoomable.